KRC4/KRC5 Driver Installation
Driver Installation: Controller-Side
Requirements
- The KUKA.RobotSensorInterface software package must installed in the robot controller. This package has an extra cost so that it has to be bought from KUKA robot manufacturer. Please follow the installation instructions received within the software package. The oldest known drag&bot compatible version is 3.1.6. For older versions please contact us directly.
- You must log in as an Expert or Administrator to make the required configuration, in this document. Your log in can expire after a time or when you change to automatic operation mode. In this case you need to log in again to continue the robot configuration.
- PC Connected to the KUKA Controller Ethernet connection labelled X66 in KRC4 or XF5 in KRC5 micro.
- The PC is the UDP server and the Robot is the client, therefore you should configure the PC IP to be
172.22.10.3unless it's changed in the dnb_rsi.xml file. - The RSI port number should be
49152unless it's changed in the dnb_rsi.xml file. - If you need to change the RSI port number or the RSI Server IP number (PC IP number), then please change it in the dnb_rsi.xml file before uploading it into the controller. More details can be found here
Downloads
The required controller files can be downloaded from here: Downloads
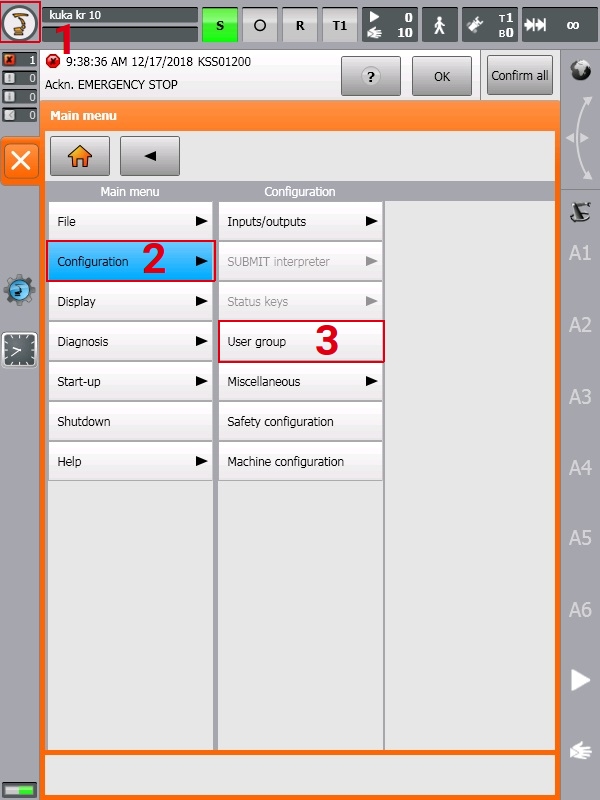
Log in as Expert
-
on the top left side of the HMI screen, then and .
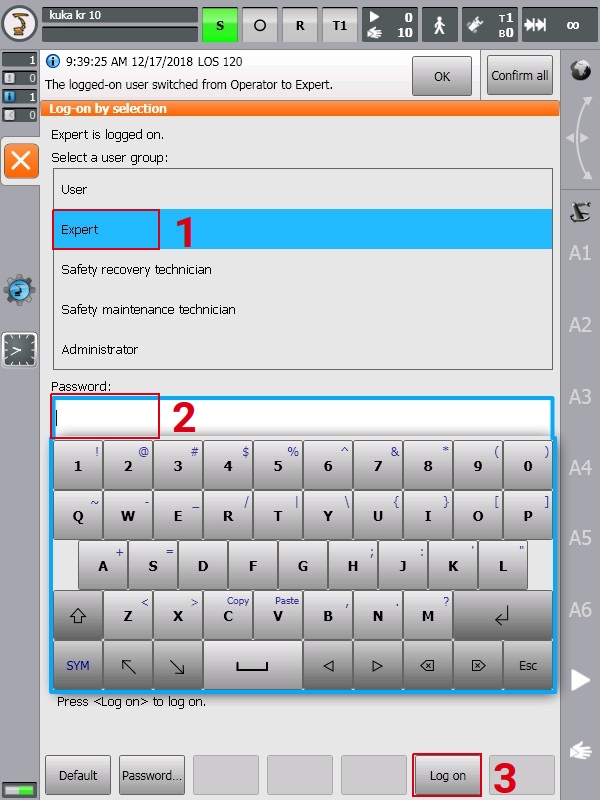
-
then enter the password (please contact with KUKA if unknown) and .
Minimize HMI and access to windows OS
Prerequisites
- Robot in T1 mode.
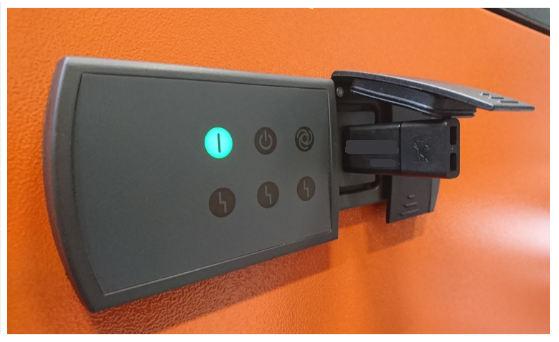
- on the top left side of the HMI screen, then and then .
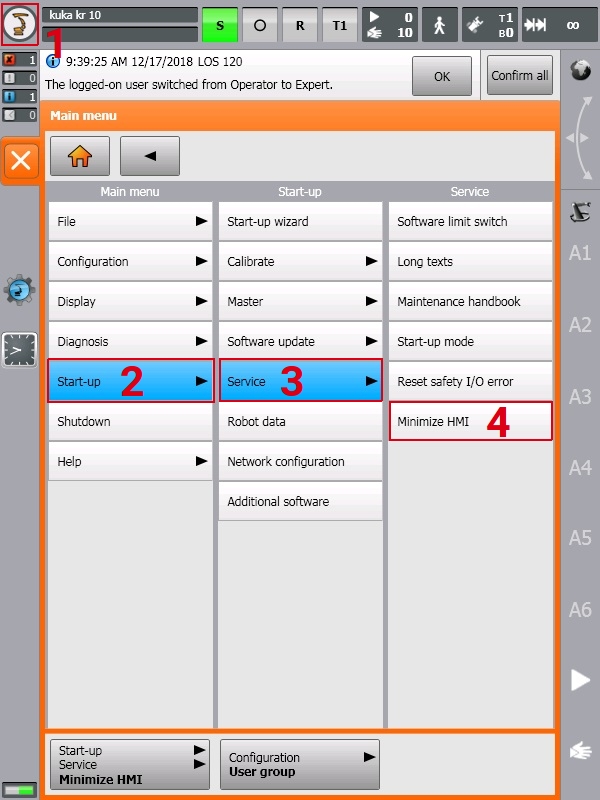 Now the window OS screen will be shown.
RSI Configuration (Version 3 and below )
Therefore you need to connect to the KUKA via mouse and keyboard. You can help yourself using a USB-Hub.
-
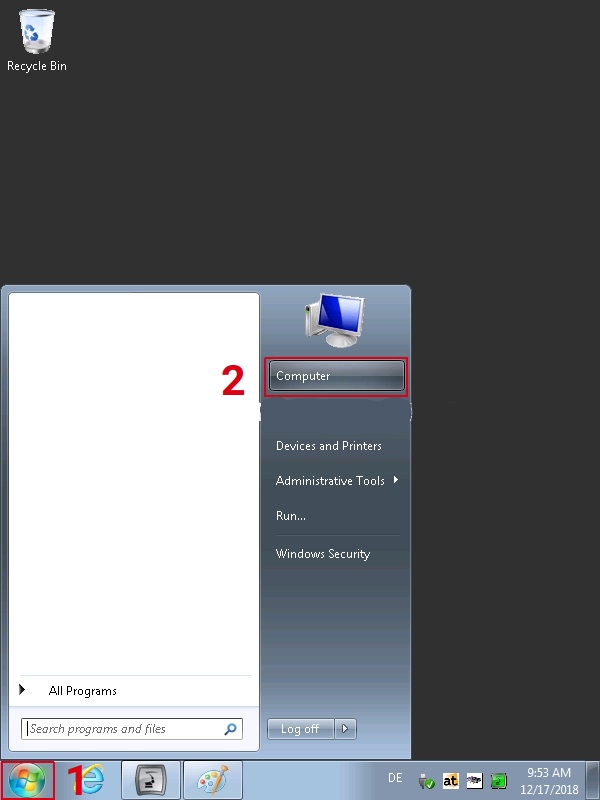
Open the windows start menu and search for
rsi, then .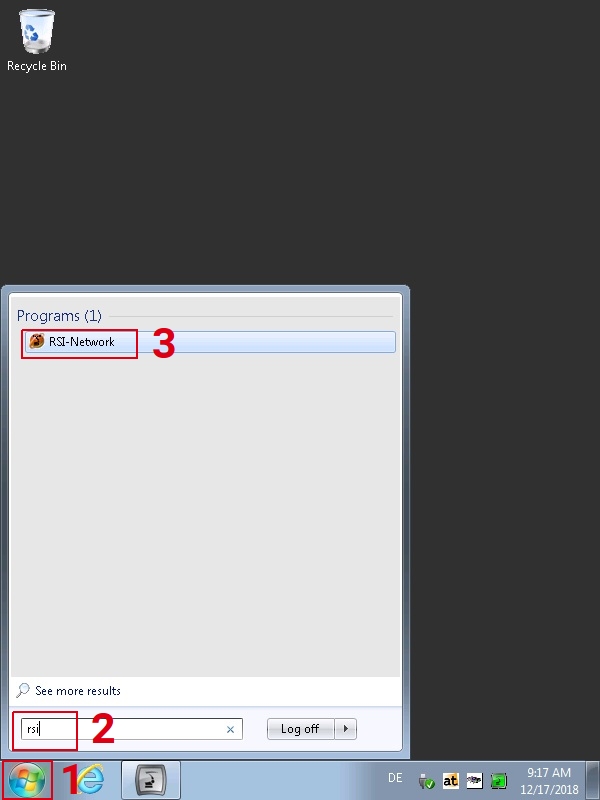
-
Under "RSI-Ethernet" then .
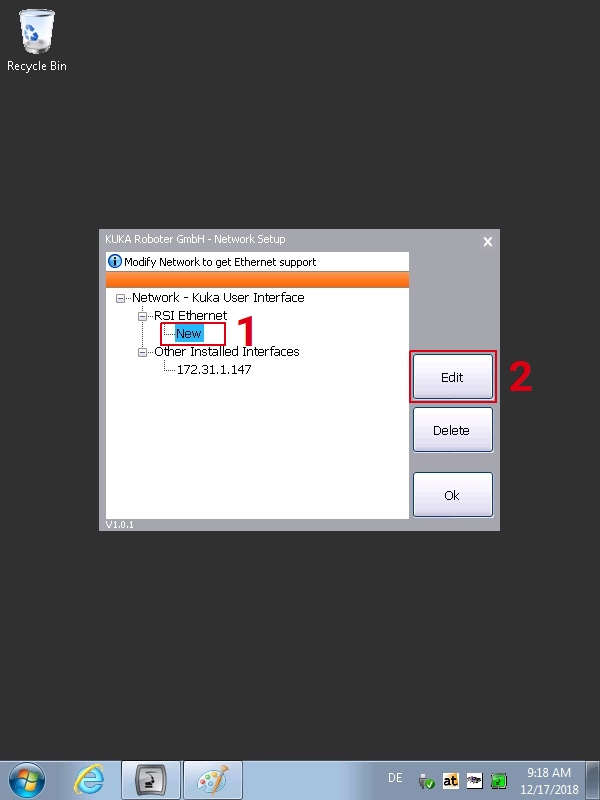
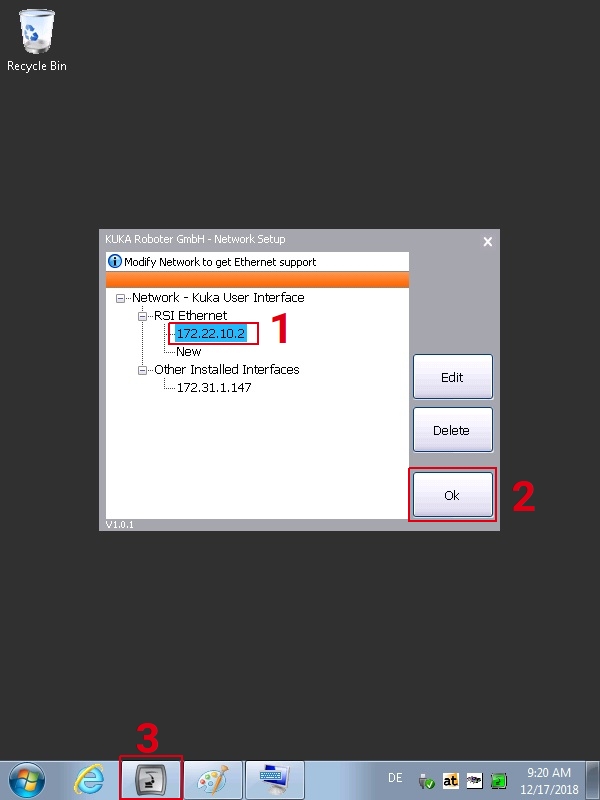
-
Enter RSI IP 172.22.10.2 then . Now in the windows taskbar to go back into the HMI screen. Please note that the robot IP should be in the same IP range of the PC. If you plan to use another IP for the PC rather than 172.22.10.3 then use a different robot IP in the same range.
-
on the top left side of the HMI screen, then and .
-
.
-
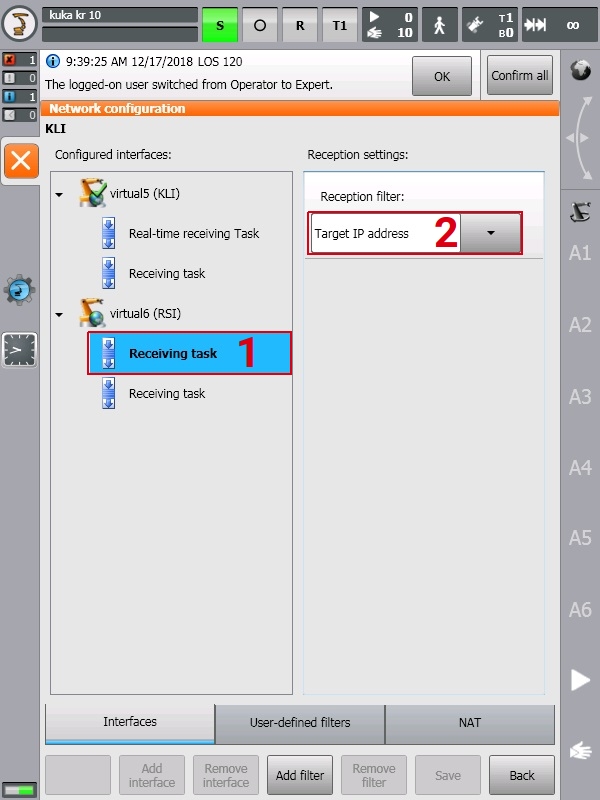
Under "virtualx (RSI)" select the first "Receiving task" and under Reception filter: select "Target IP address".
-
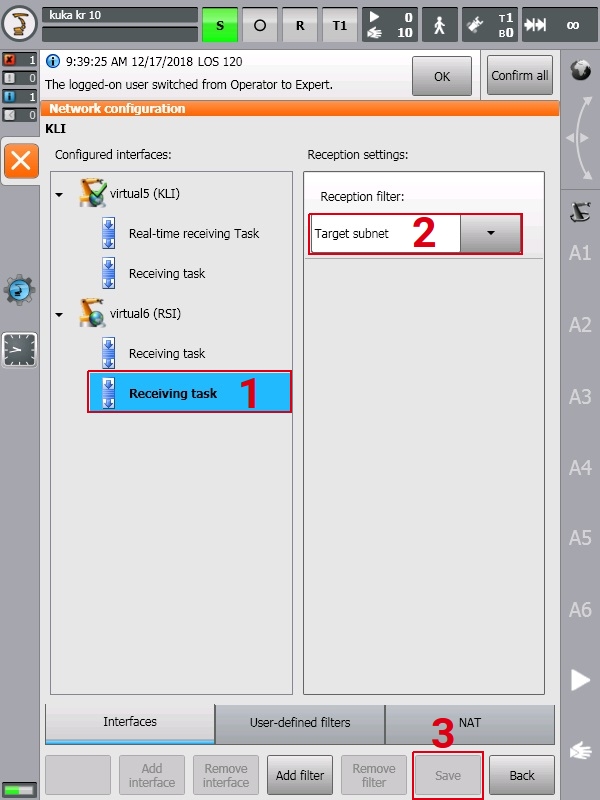
Select the second "Receiving task" and under Reception filter: select "Target subnet" then .
Note
- A warning message that asking you to restart the controller in order for the new network configuration to take place will be shown, please click on ok and don't restart the Controller (it will be restated after the whole installation).
RSI Configuration (Version 4 & 5)
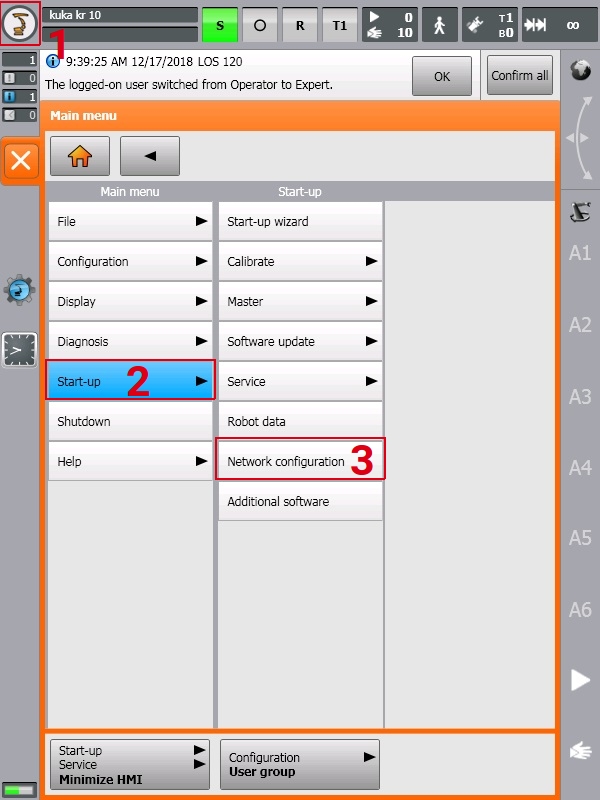
-
on the top left side of the HMI screen, then and .
-
.
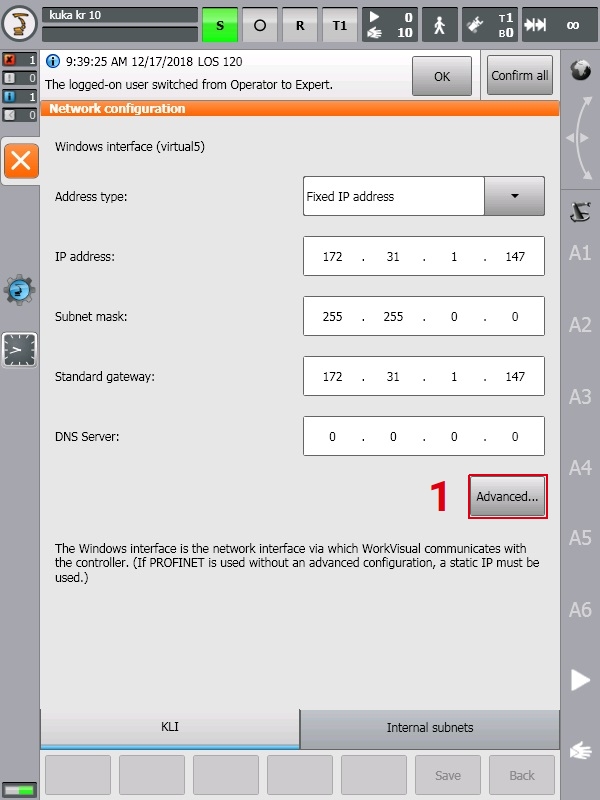
-
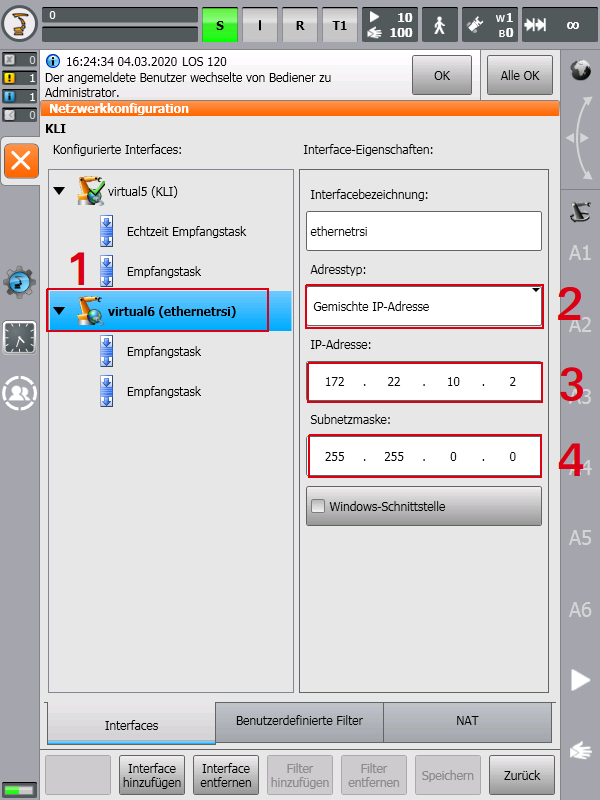
Click on "virtual6(ethernetrsi)" (If not exists, please add it by clicking on add interface on the down part of the teach pendant) and set the "address type" as "mixed IP address", set the "IP address" as "172.22.10.2", set the "subnet mask" as "255.255.0.0" ensure the other parameters match the picture below. The robot IP should be in the same IP range of the PC, if you plan to use another IP for the PC rather than 172.22.10.3 then please use different robot IP in the same range.
-
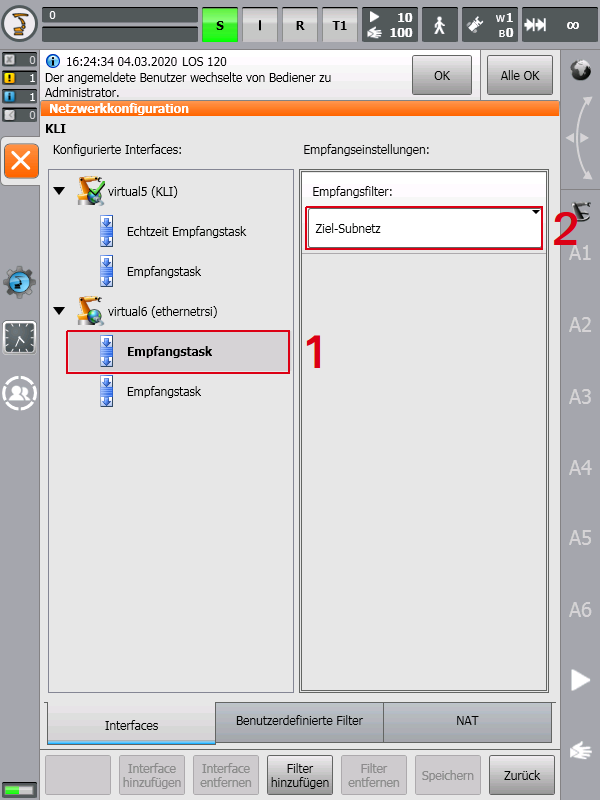
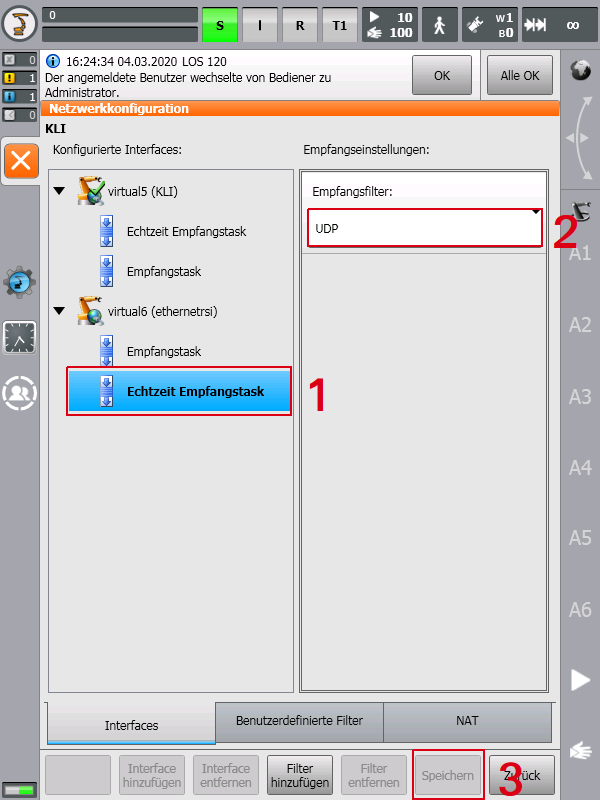
Under "virtual6(ethernetrsi)" select the first "Receiving task" and under Reception filter: select "Target subnet".
-
Select the second "Receiving task" and under Reception filter: select "UDP" then .
Note
- A warning message that asking you to restart the controller in order for the new network configuration to take place will be shown, please click on ok and don't restart the Controller (it will be restated after the whole installation).
Drag and Bot Driver Installation
Prerequisites
- You should be logged in as an Expert or Administrator in order to see and access the USB flash drive.
Note
- The RSI communication use port number '49152' be default, if you wish to use another port then please change the port number in the file dnb_rsi.xml before you upload it to the controller.

-
Transfer the Drag and Bot Files into a USB flash drive, then connect the it to the KRC4/KRC5 USB port (Don't use the USB port in the back of the HMI).
-
In the Navigation window, navigate to the Drag and Bot files on the USB flash drive, then select
dnb_rsi.datanddnb_rsi.srcfiles then and .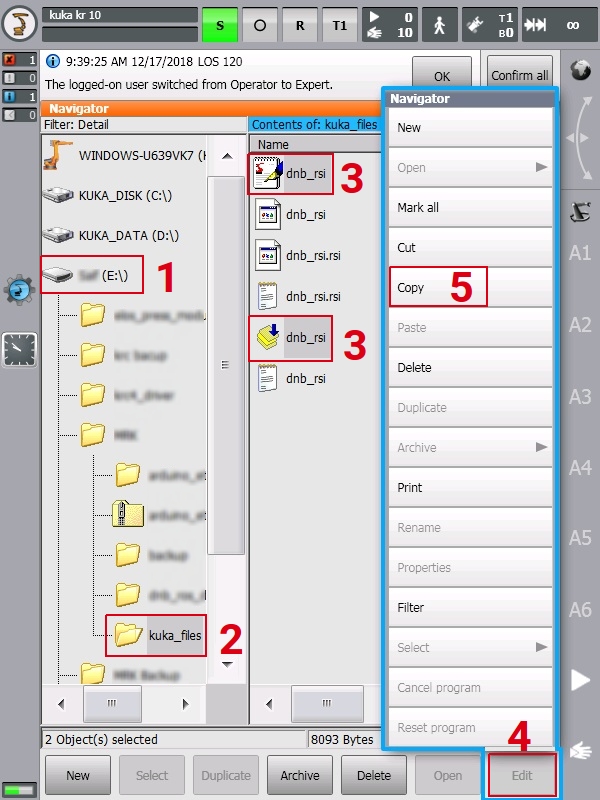
-
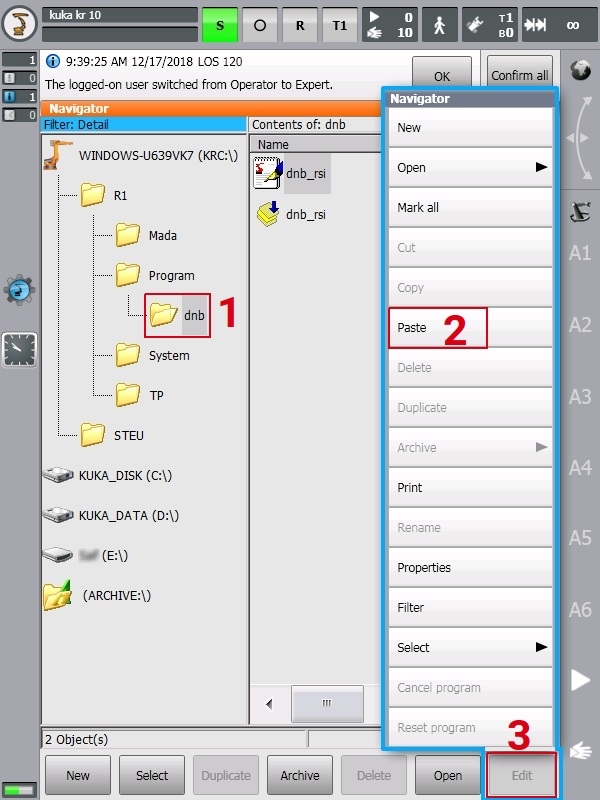
In the Navigation window open the Program folder under the path KRC:\ -> R1 -> Program and create a new folder by then , give the new folder the name dnb .

-
Open the dnb folder, then . Now the dnb_rsi.dat and dnb_rsi.src files will be copied into the dnb folder.
-
Minimize the HMI to access the windows OS. Click here to see how.
-
From the windows start menu .
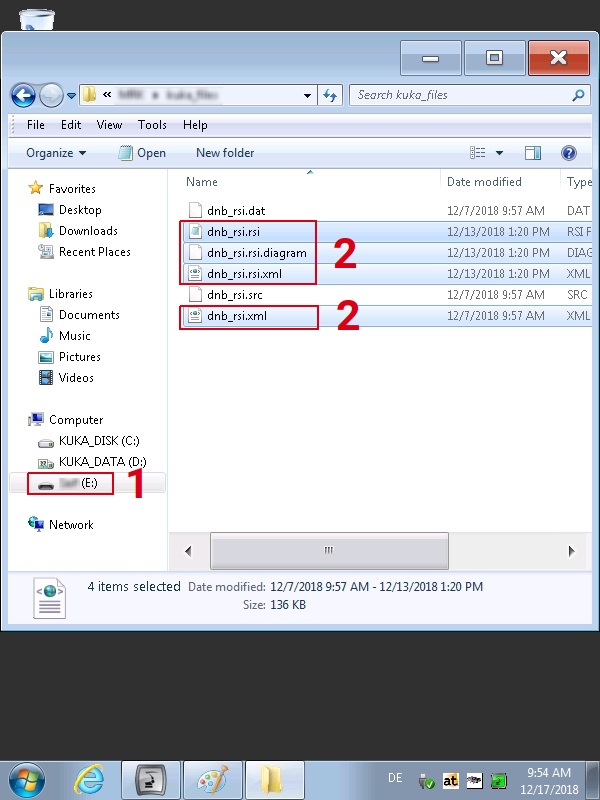
-
Navigate to the Drag and Bot files on the USB flash drive, select and copy the dnb_rsi.rsi (dnb_rsi.rsix in case of RSI ver. 4), dnb_rsi.rsi.diagram, dnb_rsi.rsi.xml, and dnb_rsi.xml files.
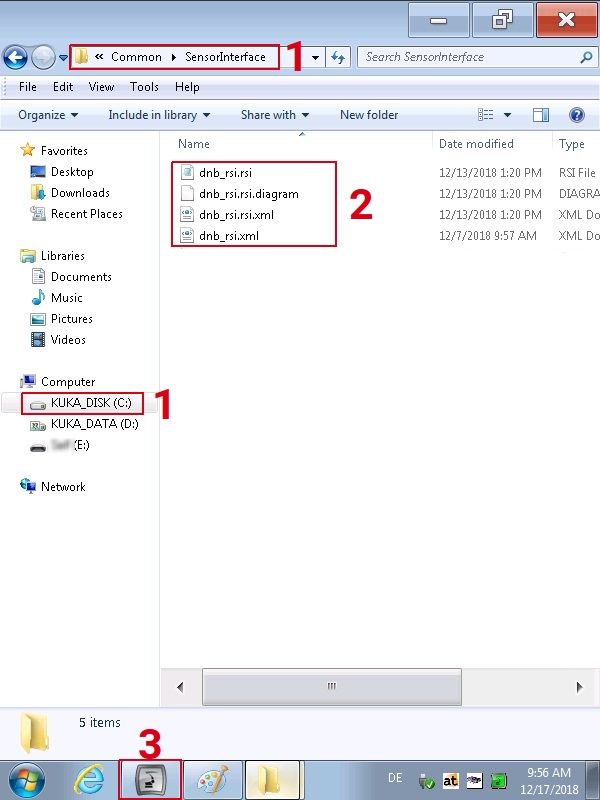
-
Navigate to the path C:\KRC\ROBOTER\Config\User\Common\SensorInterface and paste the 4 files there. Now in the windows taskbar to go back into the HMI screen
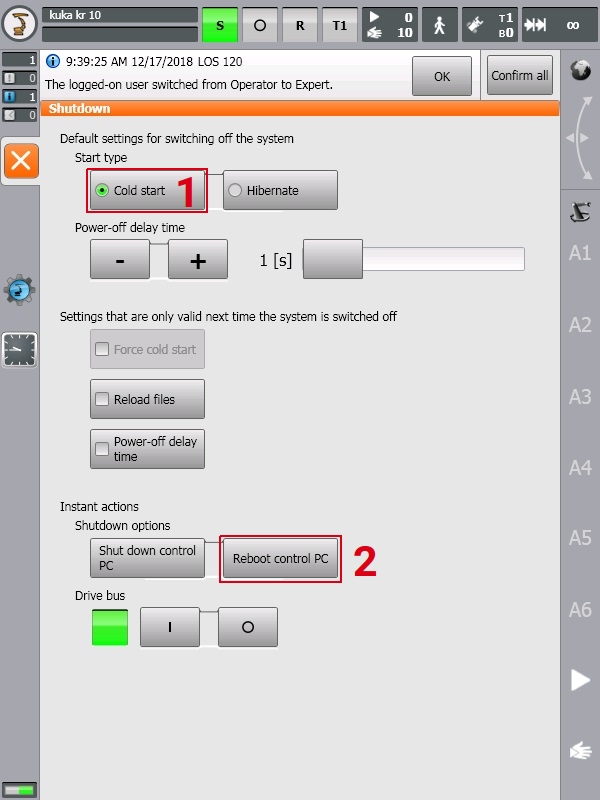
Controller Restart
-
on the top left side of the HMI screen then .
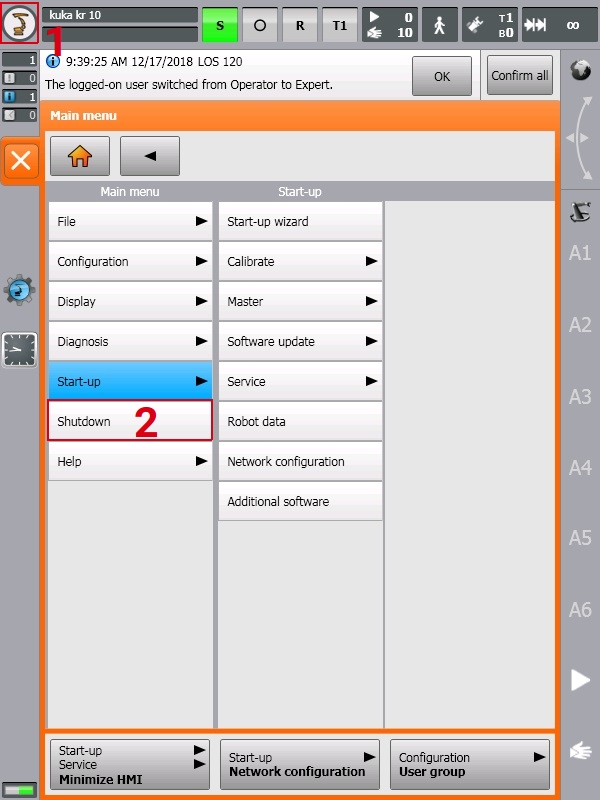
-
and (if it's requested when you saved the IP configuration) then ". Now wait till the Controller restarted.
Now the robot controller side installation is finished. You can continue with the tutorial KRC4/KRC5 Running.