Pick&Place programs
The following chapter contains variants of the Pick&Place program that build on each other:
- Create a basic Pick&Place program,
- Extension: Movement optimization
- Extension: Add loop
- Extension: Add input parameters
- Extension: Add case distinction and user dialog
What you will learn
- Adding the "Loop" function
- Determination of the number of loops
Extension: Add loop
Video Tutorial
Step-by-step Guide
-
The basis of the program is the Pick&Place program with PTP and blending of the previous chapter.
-
Go to the program overview and duplicate the previous program.
-
Edit the copy of the program and rename the program first.
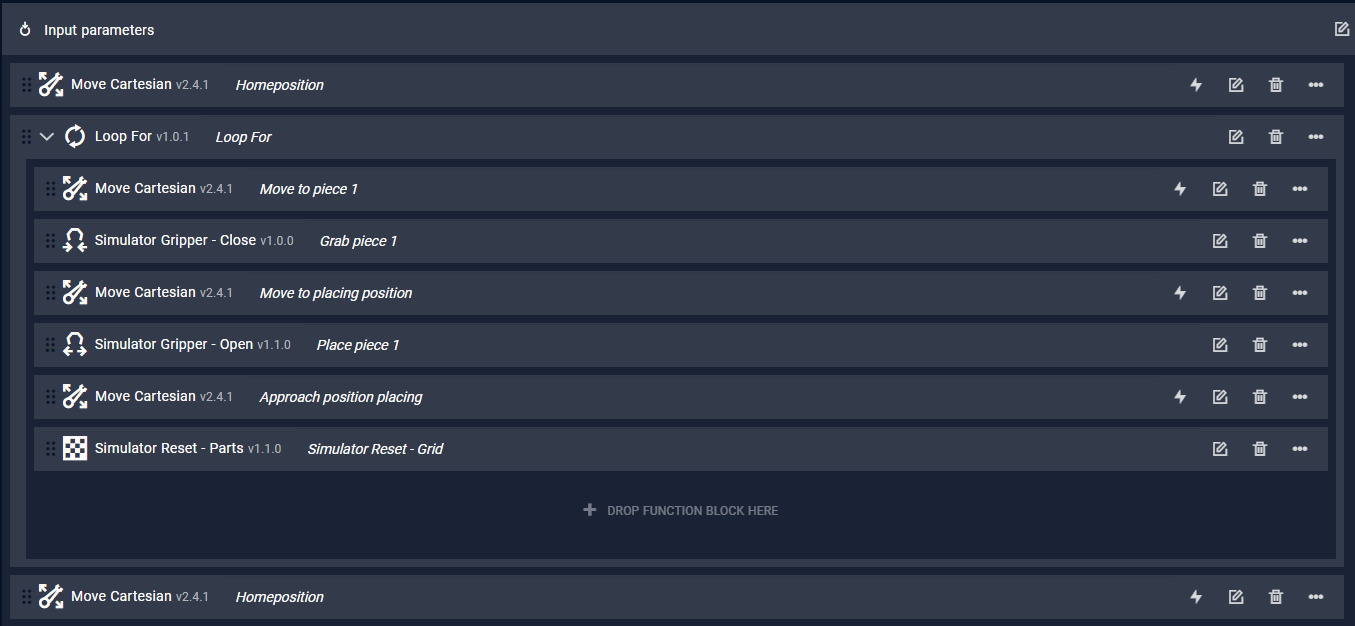
Adding the loop
-
The
Loop Forfunction block repeats the execution of a program in loops. -
To do this, drag the
Loop Forfunction block to the beginning of the program. -
You now see another program field within the
Loop Forfunction block. Drag all previous function blocks into this field.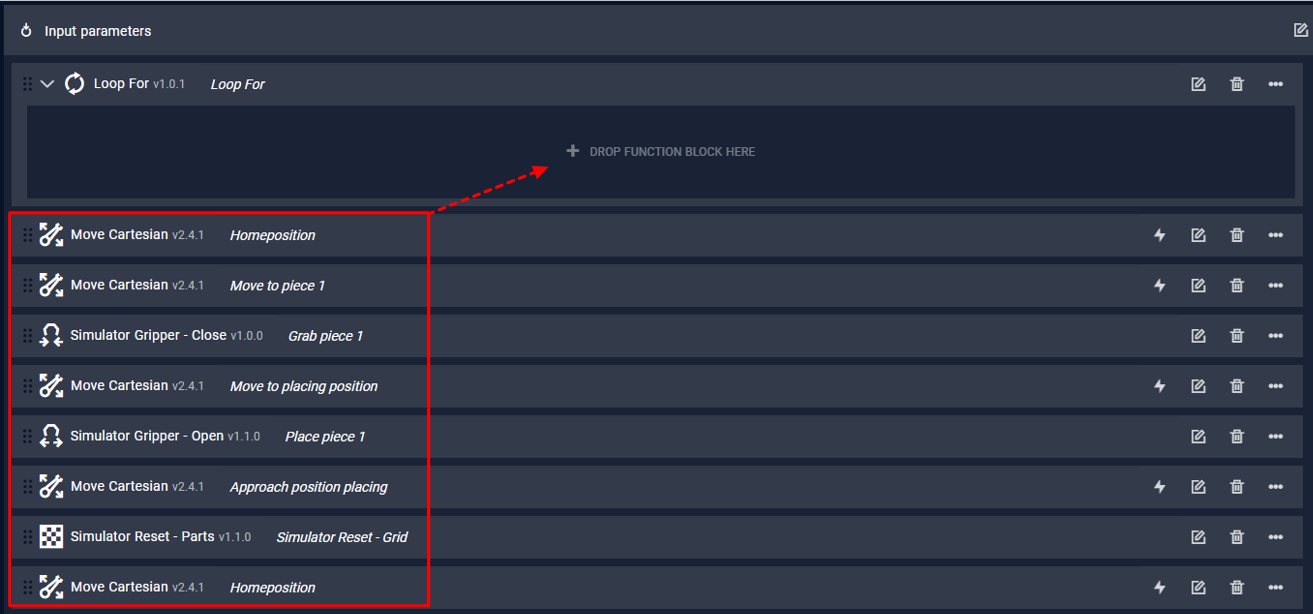
Reset simulator and palette
-
Also add the function block
Simulator Reset - Allto reset the simulator and palette at the end of the loop. -
Drag the two
Homepositionblocks before and after theLoop Forfunction block. -
To determine the number of loops, click on the
Set Parametersfield next to theLoop Forblock. Now you can set the number in theTurnsfield. -
Ready! You have created a Pick&Place program with a loop and can now run the program. (You can download the program here. At "My Programs" -> you can load external programs into drag&bot.)