Introduction
This section describes how you can connect the EPSON RC+ 7.0 software with a physical controller and gain control for changing configurations and installing or modifying programs. In the first tutorial is assumed that no program is running. If drag&bot is already running, please also check the second section.
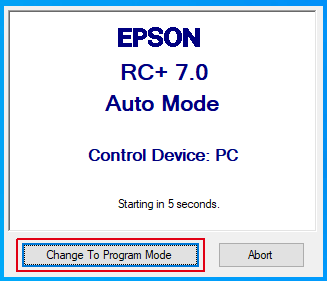
Epson - Connecting to a Controller in Auto Mode
-
Click on Change To Program Mode.
-
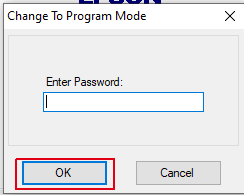
Enter your controller password and click OK. The default controller setting is without a password, in that case just click OK.
-
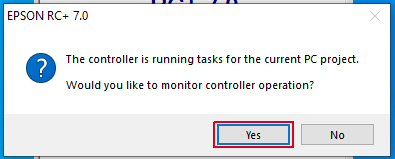
Click Yes.
-
Click Yes again.
-
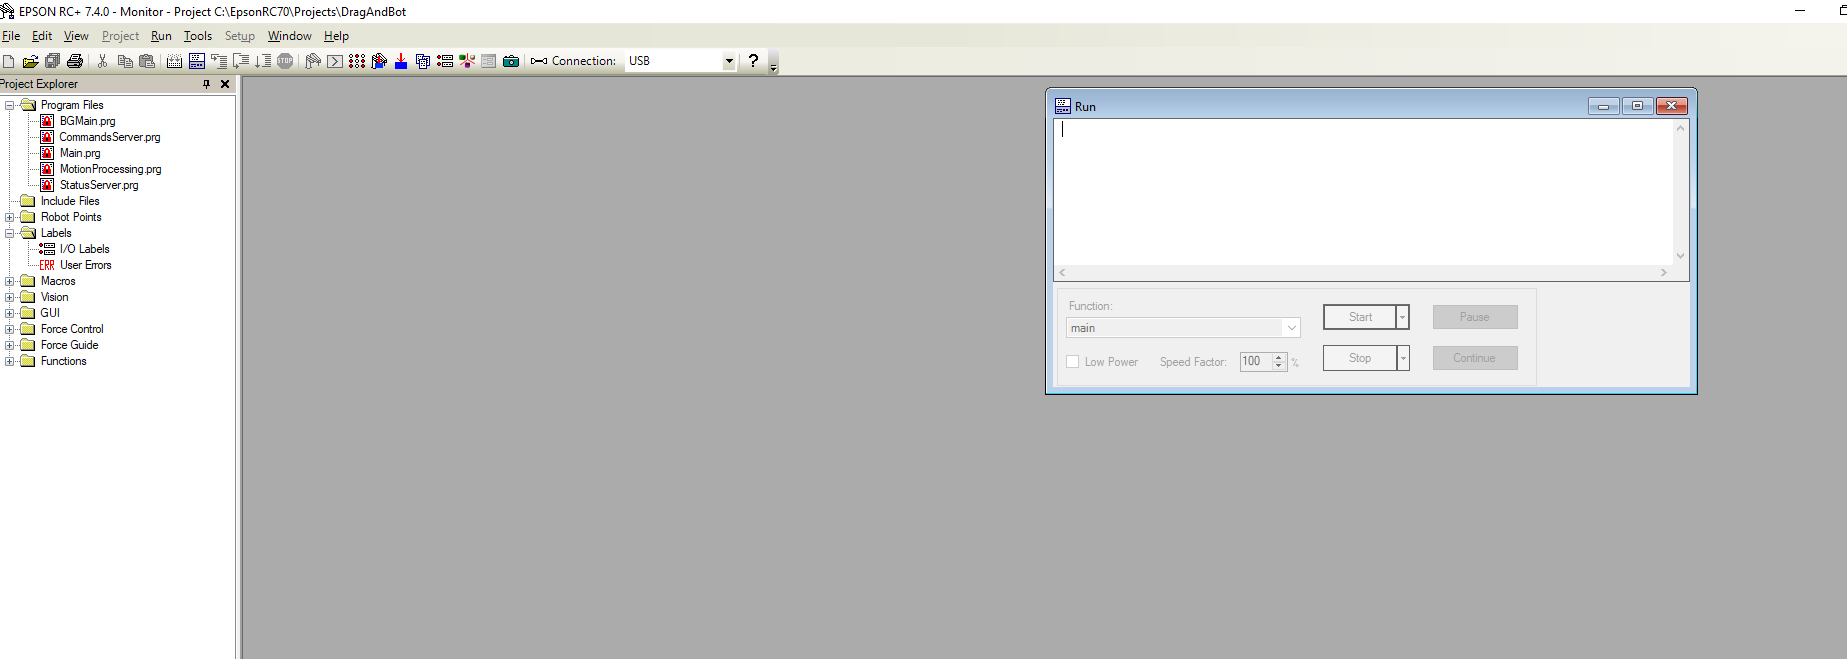
When the Epson RC+ Software is opened, push the robot emergency switch.
-
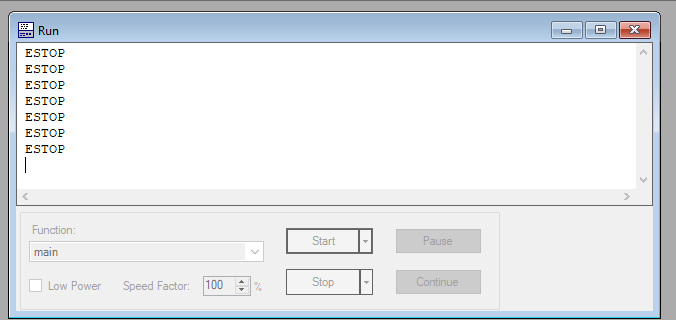
The run window will start showing ESTOP message. Release the robot emergency switch.
-
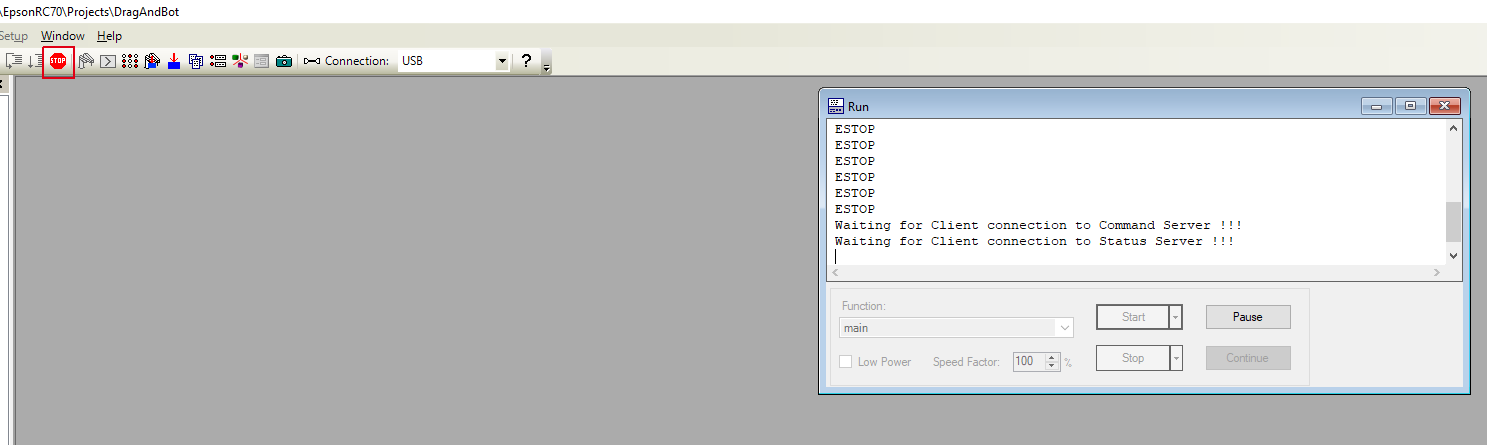
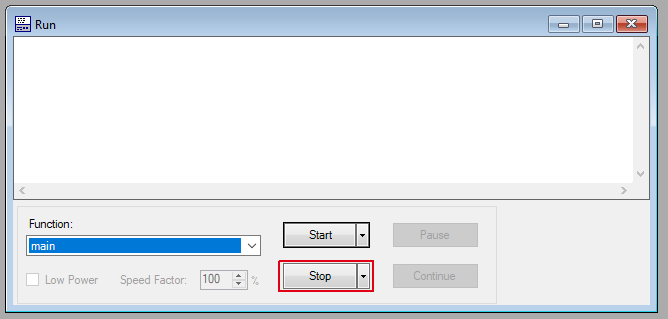
The run window will start showing the Waiting for Client connection.... message. Click on the STOP icon.
-
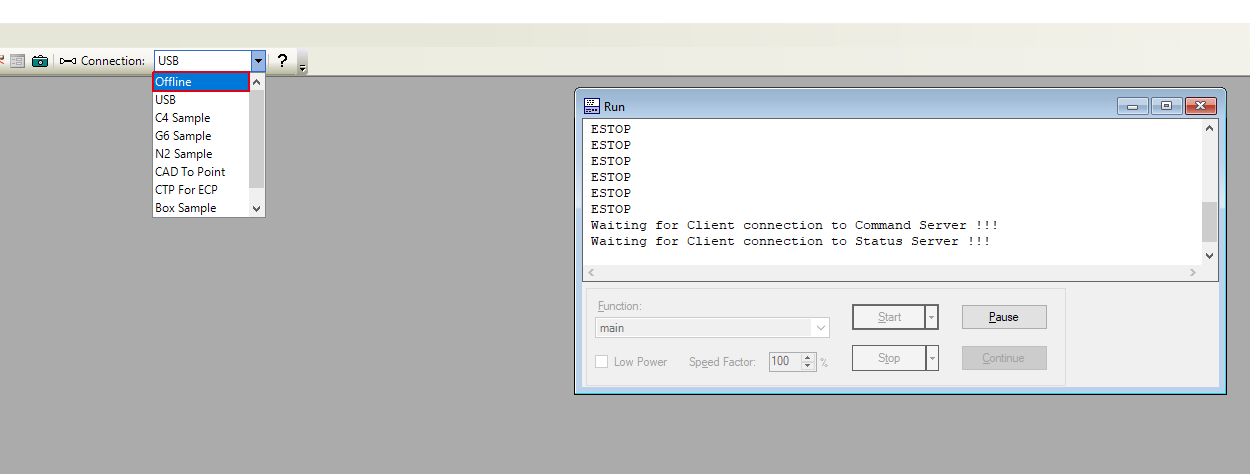
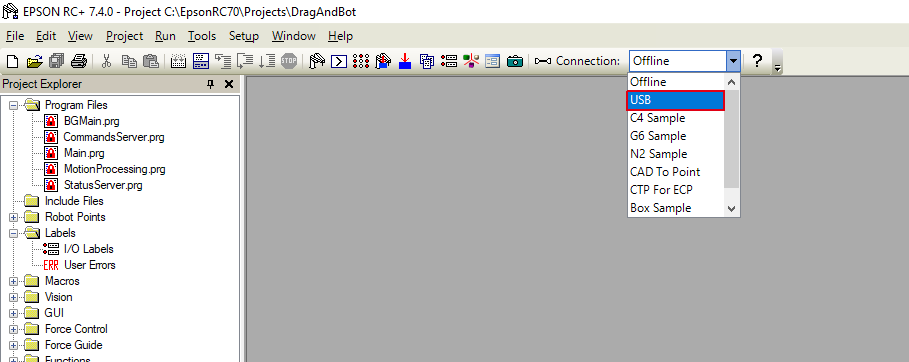
Select Offline in the Connection field.
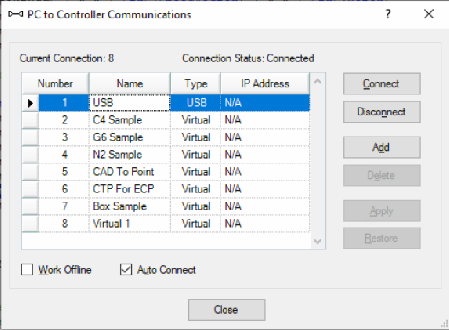
-
Select USB in the Connection field.
-
Click on Stop.
-
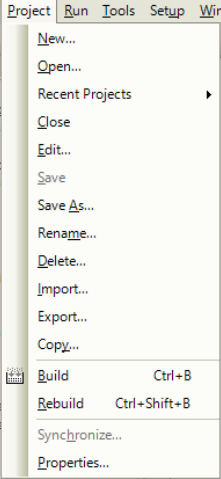
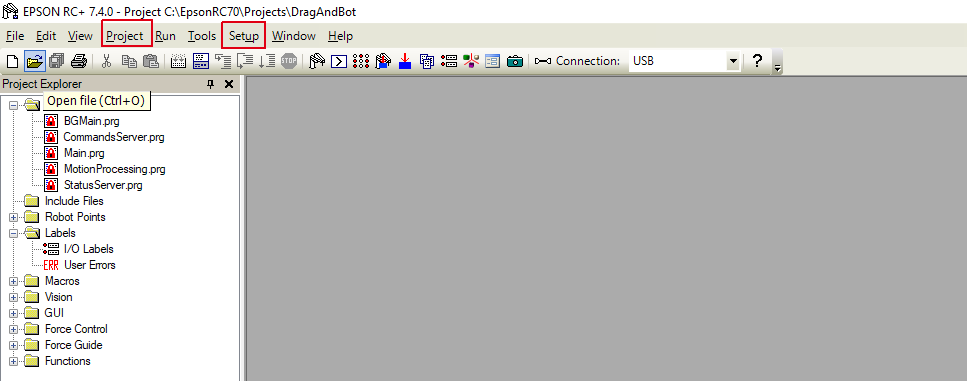
The running program is stopped and you can notice that the Project and Setup menu are activated.
-
You can now continue with next steps to set up the drag&bot driver here .
Connect when drag&bot driver is running
If program tasks are already running in background. RC7+ software may complain that it cannot gain control of the controller because a program is already running. Restart, emergency stop, power off, etc. may not help. The following steps should unlock the controller.
-
Start the robot controller in automatic mode. The driver will start running.
-
Start RC7+ software tool in a Windows PC.
-
Disconnect from USB pressing first the icon on the left of Connection and then Disconnect in the menu.
-
Open the project and Rebuild / Build it. It may be necessary also to press Synchronize. Now the RC7+ software should have control of the controller.