Driver Setup - Yaskawa normal teach pendant
Requirements
- A Yaskawa MotoPlus-enabled robot controller.
- Management Mode and Editing Mode passwords are the default or known.
Warning
Currently, the drag&bot Yaskawa driver was only tested with the YRC1000 controller.
Downloads
The required controller files can be downloaded from here: Downloads
Setup: controller side
The drag&bot runtime requires the installation of drag&bot's motoplus application DragAndBot.out in the robot controller. Therefore the following steps should be followed in exact order:
- STEP-01 Before installing the drag&bot driver in the controller, the controller must be booted in maintenance mode an logged in management mode.
- STEP-02 Check the MotoPlus configuration and change it if required. This is required to activate the MotoPlus functionality and to make the DragAndBot driver automatically loading at the controller startup.
- STEP-03 Upload the DragAndBot controller driver.
- STEP-04 Reset the controller to the normal operation mode.
Important
For further details, please check the chapter 5.0 Installation and Start-up of Application Program of the YRC1000 OPTIONS INSTRUCTIONS User’s Manual For New Language Environment MotoPlus Manual No. HW1483600.
Important
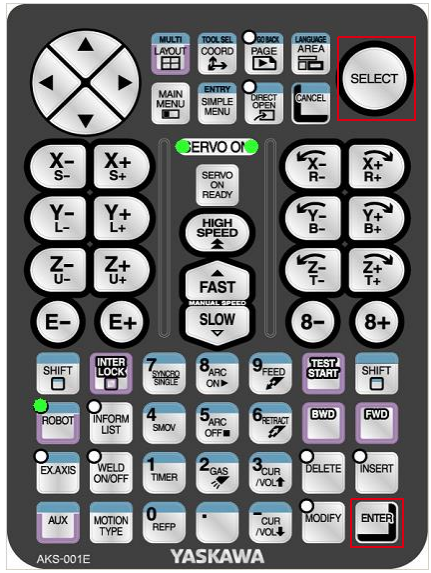
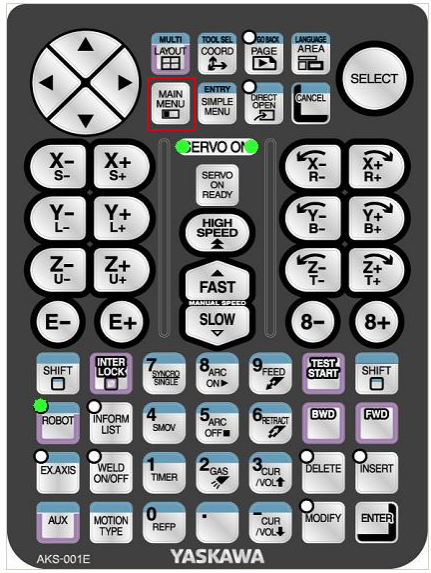
The terms SELECT KEY and ENTER KEY refer to the marked hard buttons on the pendant keyboard.
STEP-01 : Booting into Maintenance Mode
-
While the controller is off, press and hold the MAIN MENU KEY button. Then turn on the controller.
-
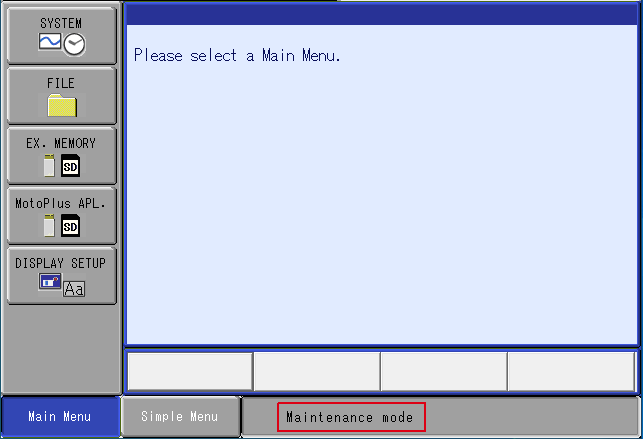
Wait untill the controller boots into the Maintenance Mode.
-
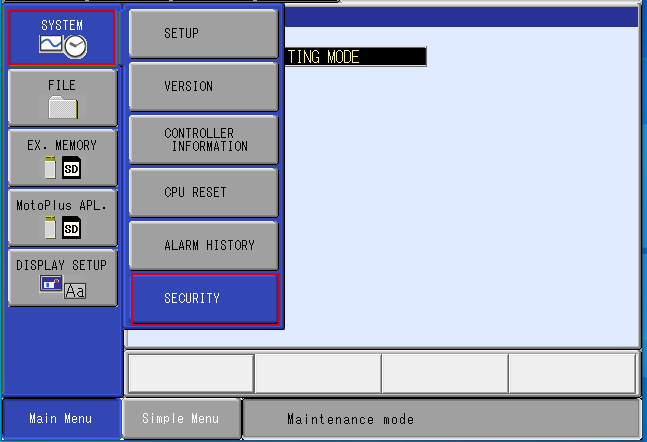
Click on SYSTEM icon and select SECURITY.
-
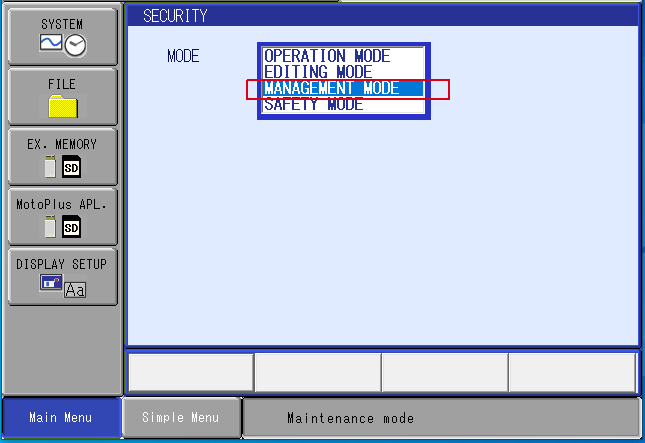
Click on the MODE field and select MANAGEMENT MODE.
-
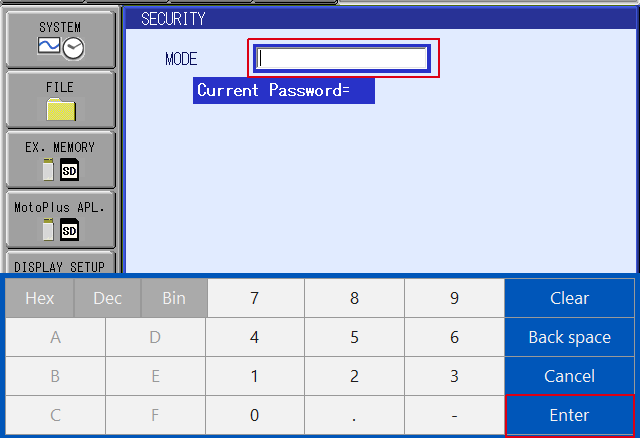
Enter the Management Mode password. Then click enter.
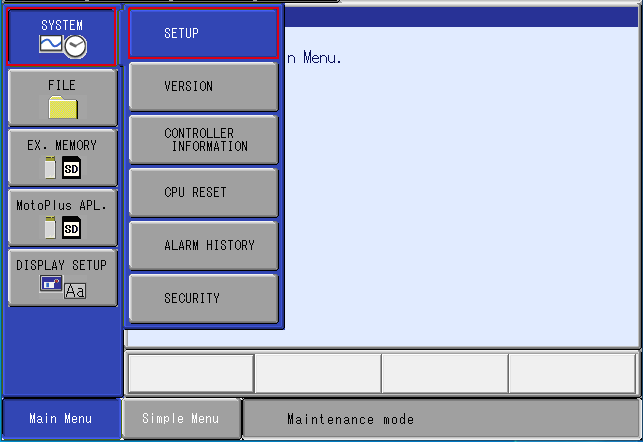
STEP-02 : MotoPlus Configuration
-
Click on the SYSTEM icon, then select SETUP.
-
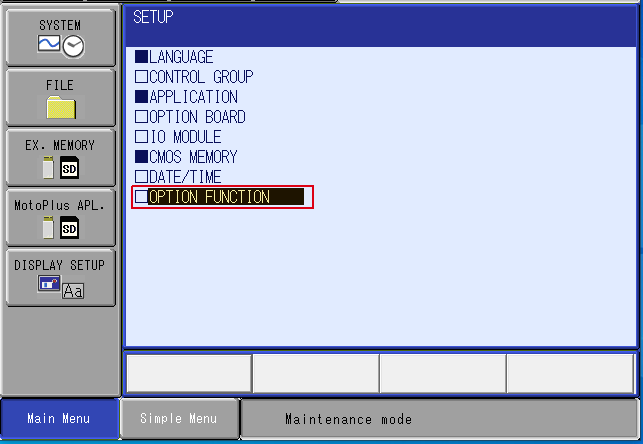
Select OPTION FUNCTION and press the ENTER KEY button.
-
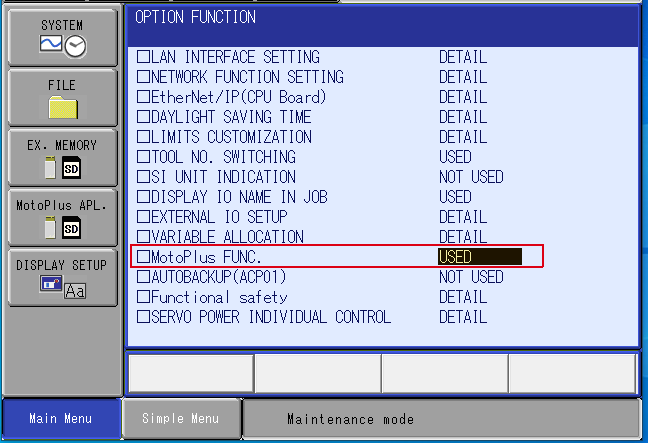
Be sure that the MotoPlus FUNC. option is selected as USED.
-
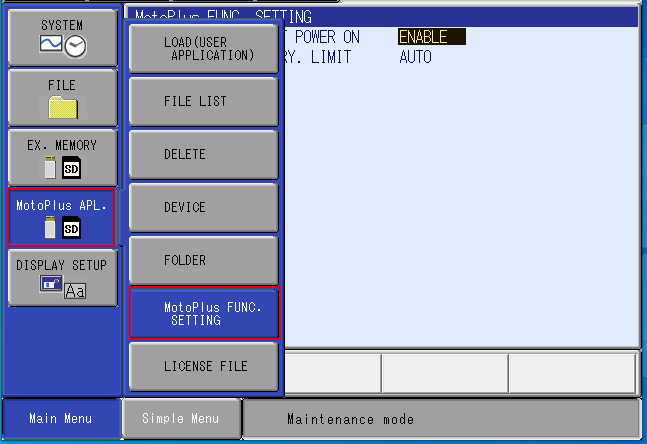
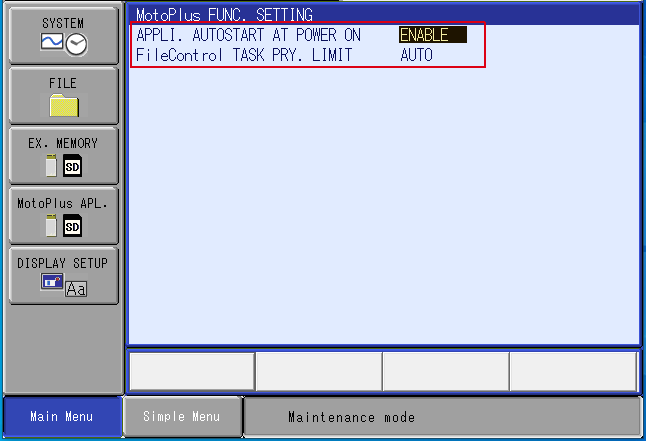
Click on the MotoPlus APL. icon, then select MotoPlus FUNC. SETTING.
-
Ensure that APPLI. AUTOSTART AT POWER ON is enabled.
STEP-03 : Load DragAndBot Controller Driver
- Download and unzip the correct drag&bot Yaskawa controller program files from here.
Warning
Only one “.out” file can be loaded at the controller startup. Thus, please install only one application. If two or more applications are installed, the alarm 1020: “MOTOPLUS APPLICATION LOAD ERROR [1]” occurs by loading.
Memory Connection
| Connection location | Type | File Format | Storage size |
|---|---|---|---|
| Normal Pendant | SD memory card or USB flash drive | FAT16 or FAT32 | Unlimited |
| Smart Pendant | USB flash drive | FAT32 | Unlimited |
| CPU board | USB flash drive | FAT16 or FAT32 | 4 GB |
-
Download and copy the DragAndBot.out file into a SD memory card or a USB flash drive.
-
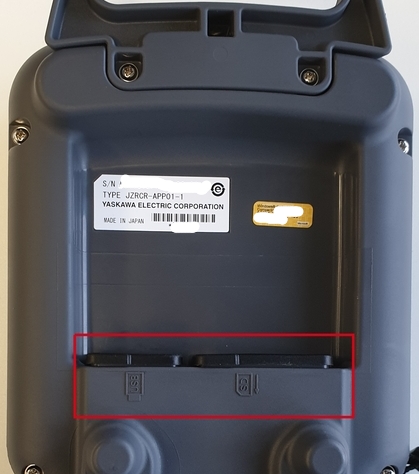
Connect the SD memory card or the USB flash drive that's contains the DragAndBot.out file into the slot in the back side of the teach pendant.
-
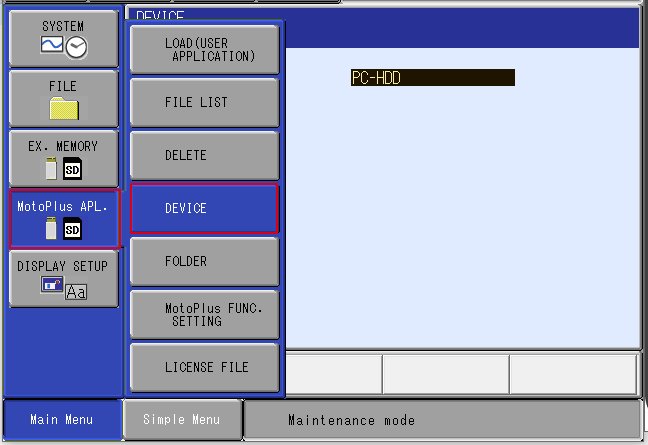
Click on the MotoPlus APL. icon, then select DEVICE.
-
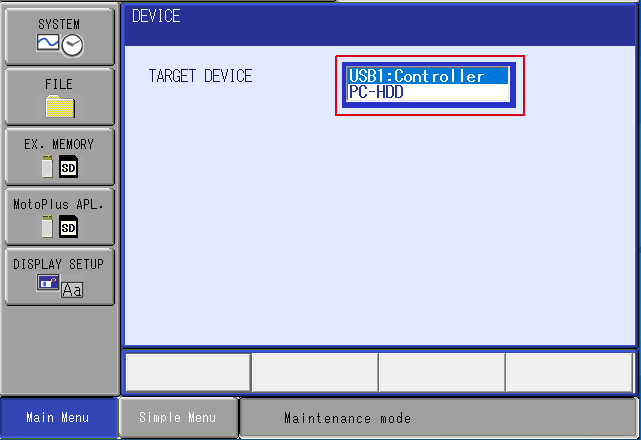
Choose the corresponding drive where the driver was copied (SD memory card or USB flash drive), then click the 'ENTER KEY' button. (NOTE: the picture below is not showing the pendant SD card and USB slots)
-
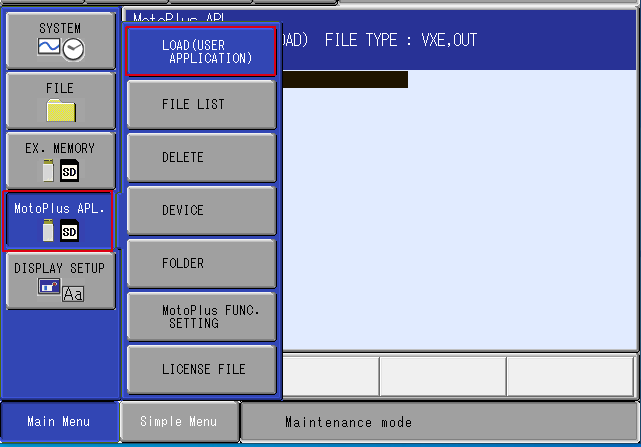
Now click on the MotoPlus APL. icon, then select LOAD (USER APPLICATION).
-
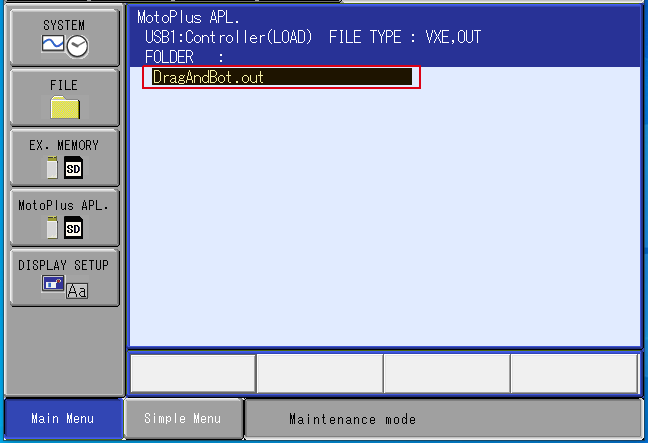
Select the DragAndBot.out file.
-
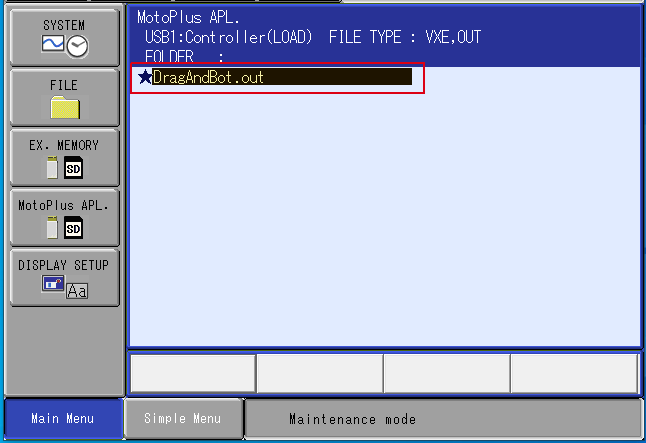
Press the SELECT KEY button. A star symbol will be displayed besides the file. Press the ENTER KEY button to load the file.
-
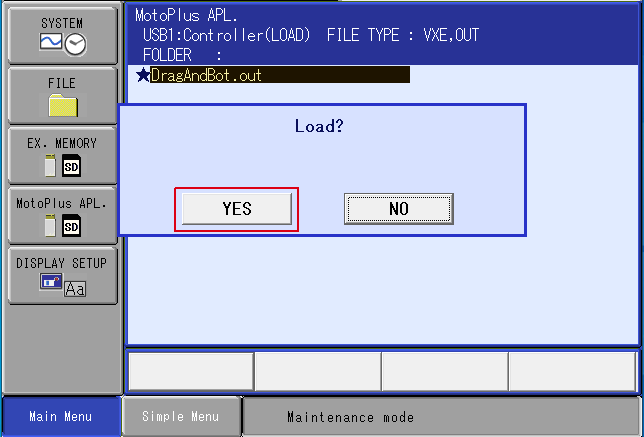
When the Load? message is shown, please click yes.
-
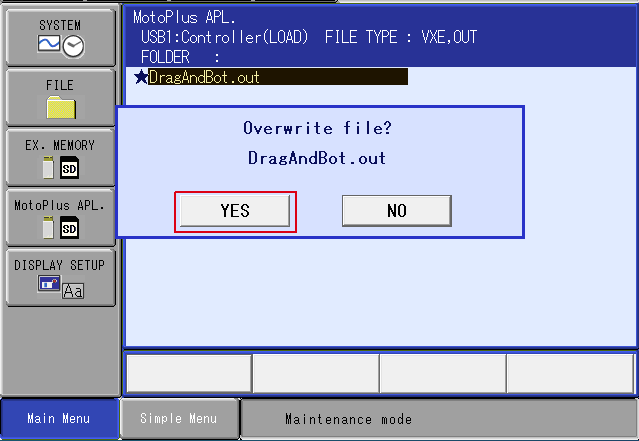
In case of updating an existing DragAndBot driver a message Overwrite file? DragAndBot.out will be shown. In that case please click yes.
-
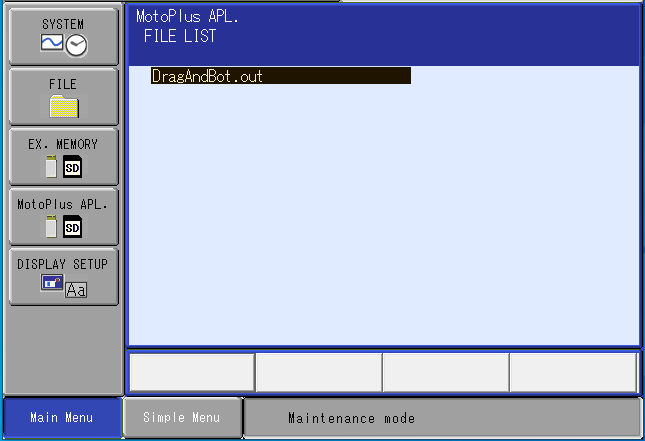
To verify that the DragAndBot driver is downloaded to the controller, click on the MotoPlus APL. icon, then select FILE LIST.

-
The DragAndBot.out file should be listed.
Now the DragAndBot driver is installed and its time to restart the controller.
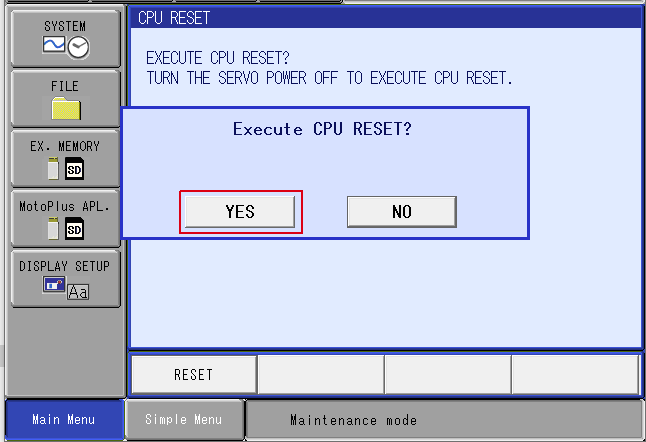
STEP-04 : Reset the controller
-
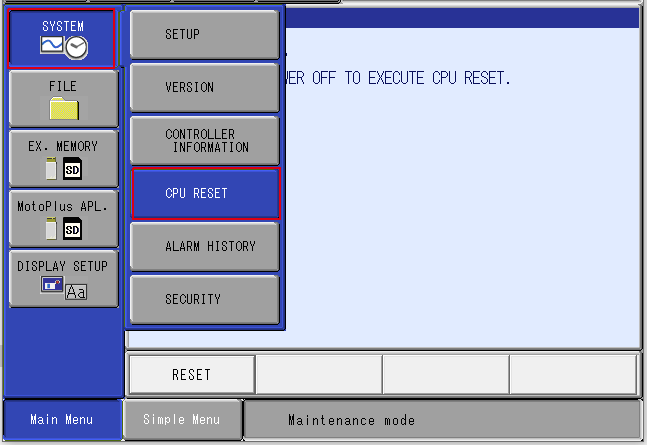
Click on SYSTEM and select CPU RESET to reboot into the normal controller operation mode.
-
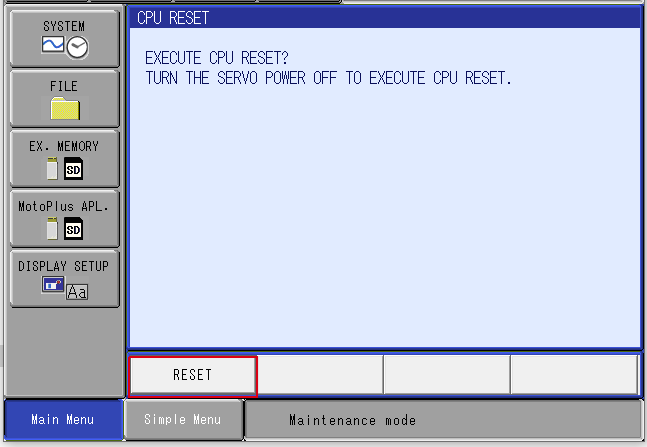
Click on RESET.
-
Click on YES.