KemroX Robot Setup
Requirements
- The KeStudio version needs to be 4.5 or newer to work with drag&bot.
- This manual assumes that you are familiar with the general use of KeStudio.
KeStudio Setup
Important
When creating the machine software for the target device, ensure to activate the RobotControl API and RobotControl WebAPI software units.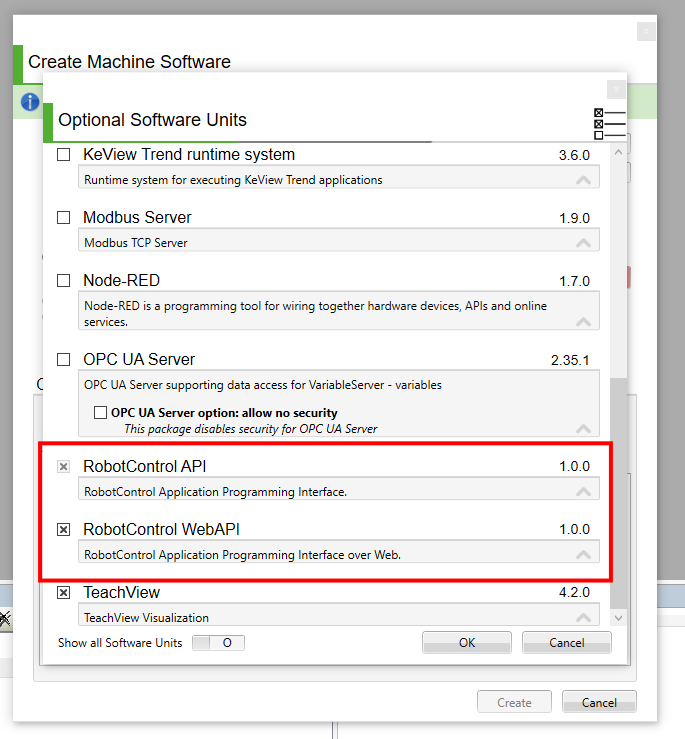
- Create a new project with Robotic as application type.
- Add the robot according to your preferences and configure it as usual.
- Note the robot's name and the IP address of the device as it has to be configured later in drag&bot.
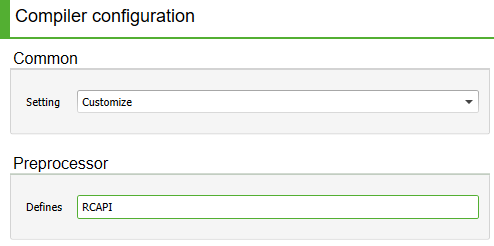
- Configure the TeachControl Object Compiler configuration as follows:
- Change the Common Setting field to Customize
- Set the Preprocessor Defines field to RCAPI
- Set the following Expert Entries in the KeStudio project:
[MC]
showReadBackValues = 2

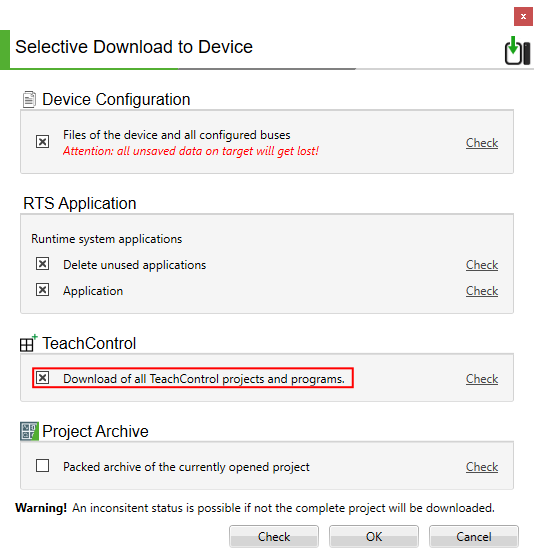
- When downloading the project to the device, ensure to also download the TeachControl application, as shown in the image below.
Setup for drag&bot Studio for the KemroX Robot Component
- Select KemroX Robot from the dropdown menu in the drag&bot Component Manger.
- Configure the parameter IP for your setup. It has to match with the IP address noted from the KeStudio setup.
- Configure the Robot Name. It has to match with the robot name noted from the KeStudio setup.
- Configure the Robot Model for visualization.
- Configure the KemroX Version of the PLC.

Setup for drag&bot Studio for the KemroX Custom Robot Component
Important
Follow this tutorial first how to integrate a custom KemroX robot in drag&bot before adding the component to your robot system setup.
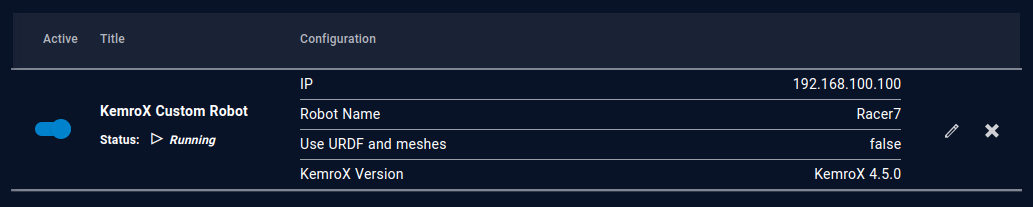
- Select KemroX Custom Robot from the dropdown menu in the drag&bot Component Manger.
- Configure the parameter IP for your setup. It has to match with the IP address noted from the KeStudio setup.
- Configure the Robot Name. It has to match with the robot name noted from the KeStudio setup.
- Activate the option Use URDF and meshes, if these are configured in the ROS package described above. Deactivate the option otherwise to avoid loading of non-existent files.
- Configure the KemroX Version of the PLC.