Meca500
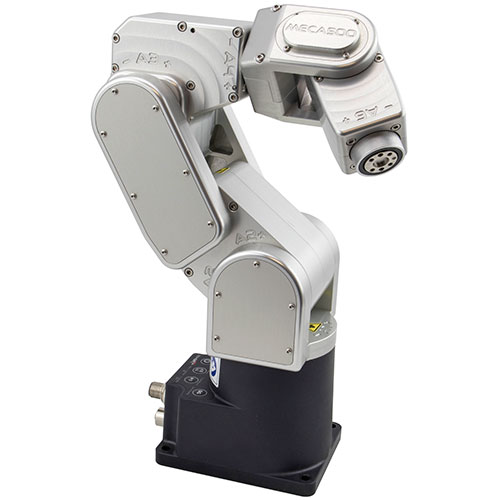
Technical Data
- Payload: 0,5 kg
- Reach: 260 mm
- Repeatability: 0,5 mm
- Weight: 4,5 kg
Important Notes
Robot needs first move for initialization
When robot is remote controlled the first motion may cause a flange rotation of 360 degrees.
This depends on the last position due to a 4-quadrant internal system. Be careful with the first move of the robot (control panel or program) because it could CRASH with nearby objects.
Startup Procedure
On robot-side
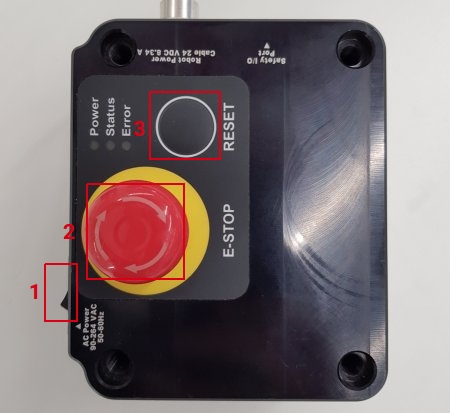
- Turn on the power switch (located on the power adapter of the Meca500)
- Release Emergency Stop (pull it)
- Press Reset Button
- You will see three LEDs blinking A, B and C
- Wait until ONLY the red light (A) is constantly flashing
- Now the robot is ready for operations or to be remote controlled
Note
The default robot IP for the Meca500 robot is IP: 192.168.0.100 This IP may have changed through the Mecademic web-panel. You can check if the robot address is reachable by using ping utility after setting up the ethernet configuration.
On IPC-side
- Connect a keyboard, a mouse and a monitor to the IPC. Depending on the IPC model, VGA, DisplayPort, DVI or HDMI connectors will be available. The IPC can also be afterwards configured to be used stand-alone without monitor from other computer in your company Intranet.
- Power on the drag&bot IPC. Automatically you will be logged into the Xubuntu operating system and lead to the desktop. If a password is requested, please use dragandbot.
- If this is the first time you are using the IPC, then please set up the network configuration as it is described in the next section. Then start drag&bot. Check this for further information about starting drag&bot
- Log in in drag&bot Studio. In case of using a local installation, browse "localhost" in Chrome.
- If this is the first time using Meca, a new robot system containing a Meca Robot component has to be configured as it is explained in how to add a new robot section.
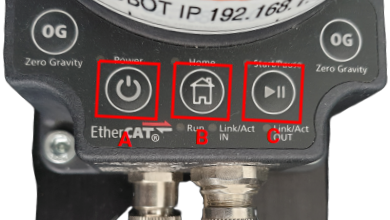
- Robot will perform a small calibration by slightly moving each joint. Wait until the red (A) and yellow (B) LEDs are flashing continuously. Then moving the robot from the control panel or starting a program will be possible.
Network Setup on the IPC-side
Connection configuration between robot and IPC
- Robot must be ready for operations. IPC must be also powered.
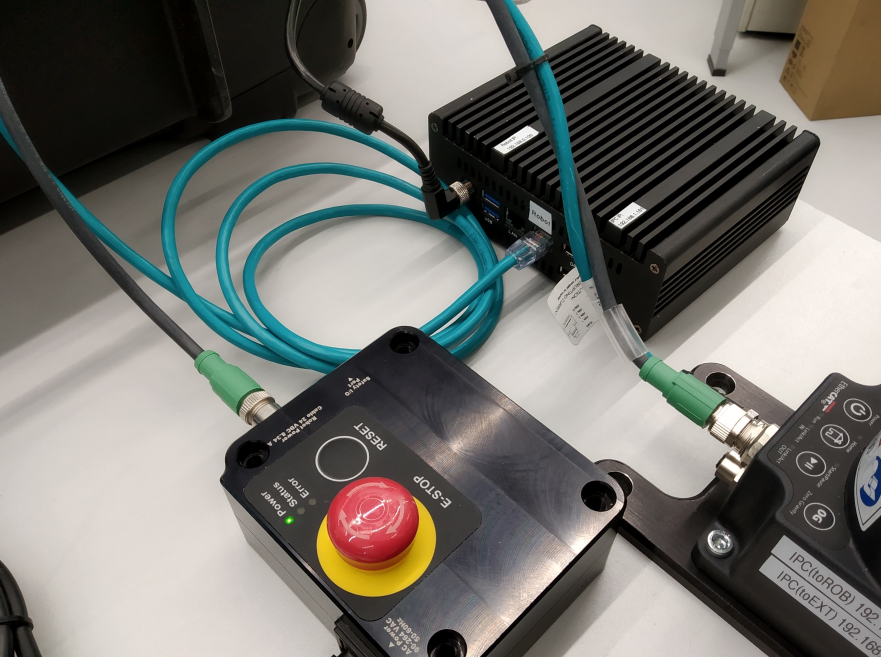
-
Connect the IPC and the robot using a LAN ethernet cable as it is shown in the following picture. Please read Connect IPC to robot site for further information
-
Create a static network with the IP range 192.168.0.x. E.g. 192.168.0.101. A detailed tutorial about how to configure an Static IP in Xubuntu can be found here. The IPC will communicate with the robot through this just recently created adapter configuration.
Connection configuration to Internet
- IPC must be powered and started.
-
Connect the IPC to the Internet through a WIFI adapter or through Ethernet.
- Ethernet: use one free ethernet connector to connect to the intranet

- Wireless connection: you will need to plug an UBUNTU compatible Wifi USB adapter. A new Wi-Fi networks section will appear below Ethernet networks a couple of seconds after plugging it.
- Ethernet: use one free ethernet connector to connect to the intranet
-
Create a new connection in a similar way as it was done in the connection between robot and IPC section. Static IP or DHCP configuration would be needed depending on your Intranet policy defined by the IT department on your company. Please contact them for further details. For Static IP you will also need to configure a gateway IP address. Sometimes a proxy configuration is also needed.
Function Blocks
The Meca500 drag&bot component provides several function blocks:
Meca Gripper - Open
Opens the gripper attached to the robot flange.
| Name | Data type | Description | |
|---|---|---|---|
| Inputs | - | ||
| Outputs | - |
Meca Gripper - Close
Closes the gripper attached to the robot flange.
| Name | Data type | Description | |
|---|---|---|---|
| Inputs | - | ||
| Outputs | - |
Meca - Move to Home Position
Moves the Meca robot to the Work Home Position. The MEGP 25 gripper should be perpendicular to the floor and pointing down. Note: This function block is a program, not a basic function block.
| Name | Data type | Description | |
|---|---|---|---|
| Inputs | - | ||
| Outputs | - |
Meca - Move to Transport Position
Moves the Meca robot to the Transport Position. The robot will move first to the home position then to the transport position to avoid possible collisions. Note: This function block is a program, not a basic function block.
| Name | Data type | Description | |
|---|---|---|---|
| Inputs | - | ||
| Outputs | - |