Define robot movements
Robot movements are based on trajectories.
What is a trajectory?
Trajectories consist of one or more waypoints. Each waypoint contains
- a pose that describes WHERE the waypoint is and contains position and orientation coordinates.
- movement parameters that define HOW the robot will move towards the position.
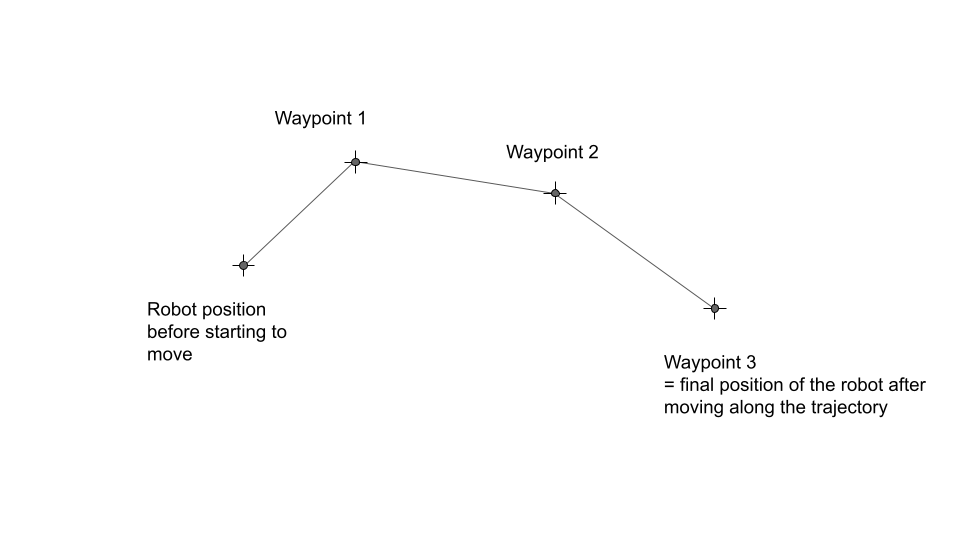
In the picture above, the robot will move from wherever it is to Waypoint 1, then to Waypoint 2 and finally to waypoint 3. How the robot will move to Waypoint 1, then to Waypoint 2 and finally to waypoint 3 is determined by the movement parameters of the respective waypoint.
Movement parameters
Movement Type: The movement type of a waypoint determines on what path the robot will move to the waypoint. There are two movement types: LIN and PTP.
| Movement Type | Description |
|---|---|
| LIN | If LIN (= linear movement) is selected, the robot will follow a defined straight line between the current pose and the target waypoint pose. In some cases a LIN motion is not possible because the robot cannot reach all poses on the line due to geometrical restrictions of the robot. |
| PTP | If PTP (= point to point) is selected, the robot will reach the target waypoint pose following an undefined curved path. The robot controller calculates a PTP path by moving each axis of the robot individually to the axis target position. |
Speed: The maximum speed the tool center point of the robot will reach during the movement to the waypoint. Units depend on the movement type. For LIN, a metric unit has to be given. For PTP, a percentage value with 100% being the maximum speed of the robot has to be given.
Acceleration: The acceleration and decelaration of the tool center point of the robot. Units again depend on the movement type.
Blending: Use blending when you want to 'cut' edges or smooth your motion when a waypoint is an intermediate waypoint as e.g. Waypoint 1 and Waypoint 2 in the picture above. This will improve cycle time as the robot will not fully stop at the end of a waypoint, but it will also not pass through the waypoint exactly. Instead, it will change direction to target the next waypoint before actually reaching the waypoint. A value of 0 means no blending, a value greater than 0 means that blending is activated.

In the picture above, Waypoint 1 has a blending value > 0 while Waypoint 2 has a blending value of 0. For Waypoint 3, the blending value is irrelevant as it is the last waypoint of the trajectory that should be reached exactly.
The greater the blending value, the greater the blending arc. As definition for blending varies from robot brand to robot brand, the exact definition depends on the used robot:
Poses
A pose describes WHERE a waypoint is. There are two possibilities to describe a pose:
- joint coordinates: contain the position of each joint of a robot.
- cartesian coordinates: describe the pose of the tool center point of the robot and contain 3 position coordinates and 3 orientation coordinates in Intrinsic Euler ZYX format (in radians): this means that first the rotation is applied in Z, then rotation in Y at the new Y position, and then rotation in X at the new position.
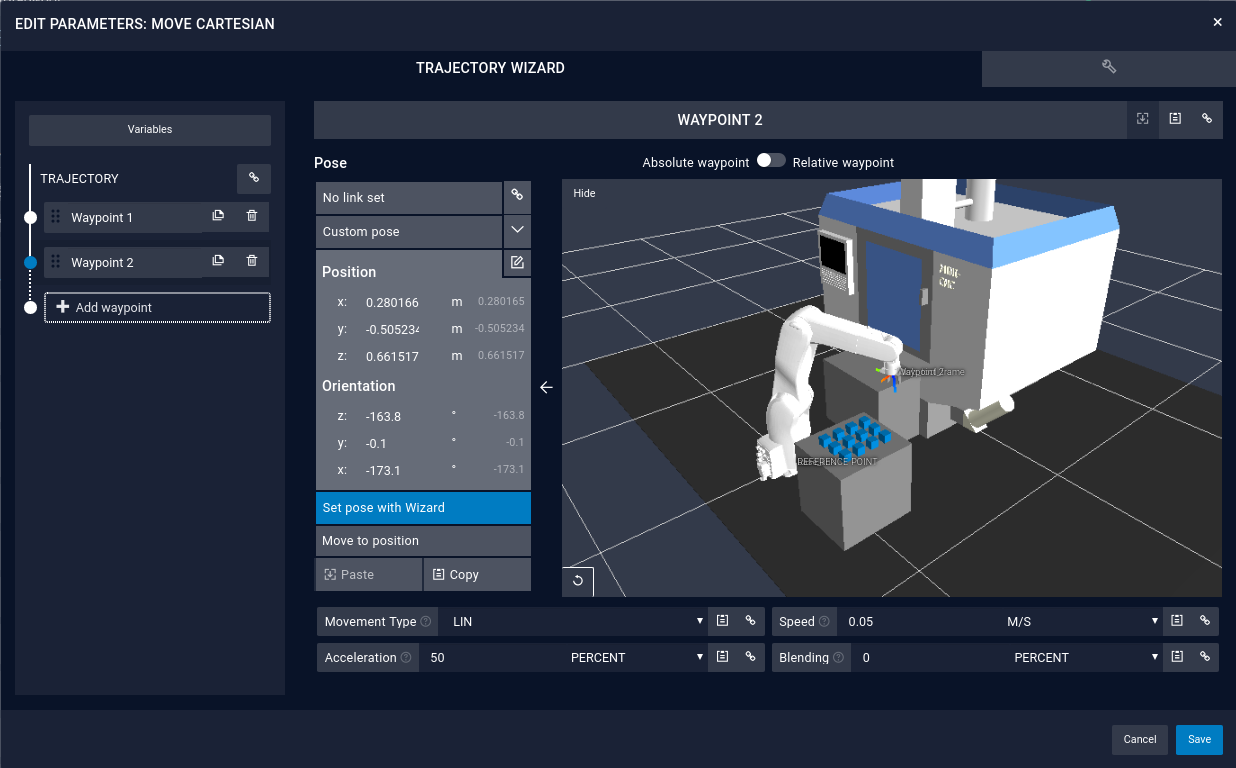
Trajectory wizard
The trajectory wizard is the tool to define robot trajectories. The wizard is mainly used to parametrize the Move Cartesian function block, but also whereever trajectories are needed.
Create a waypoint
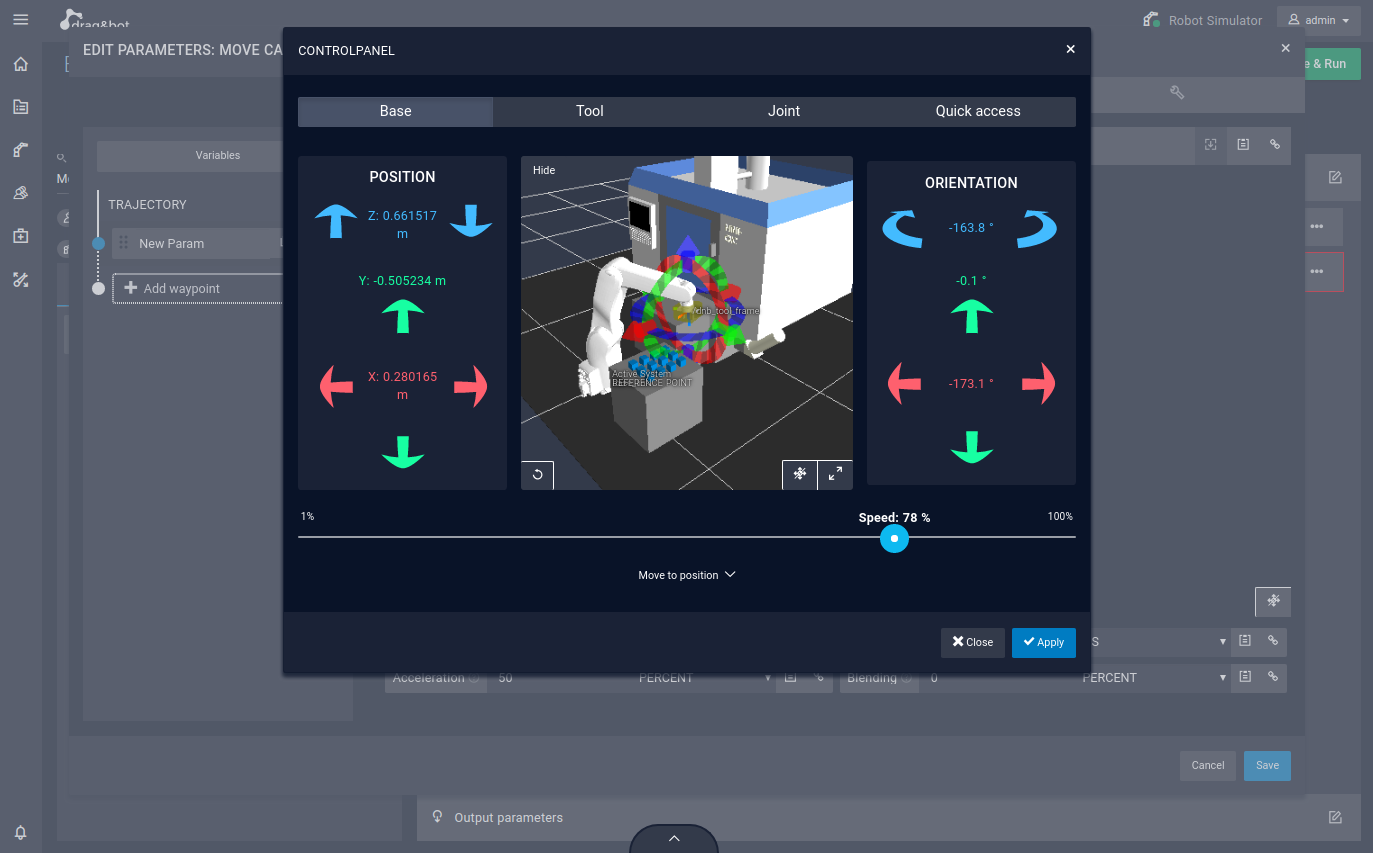
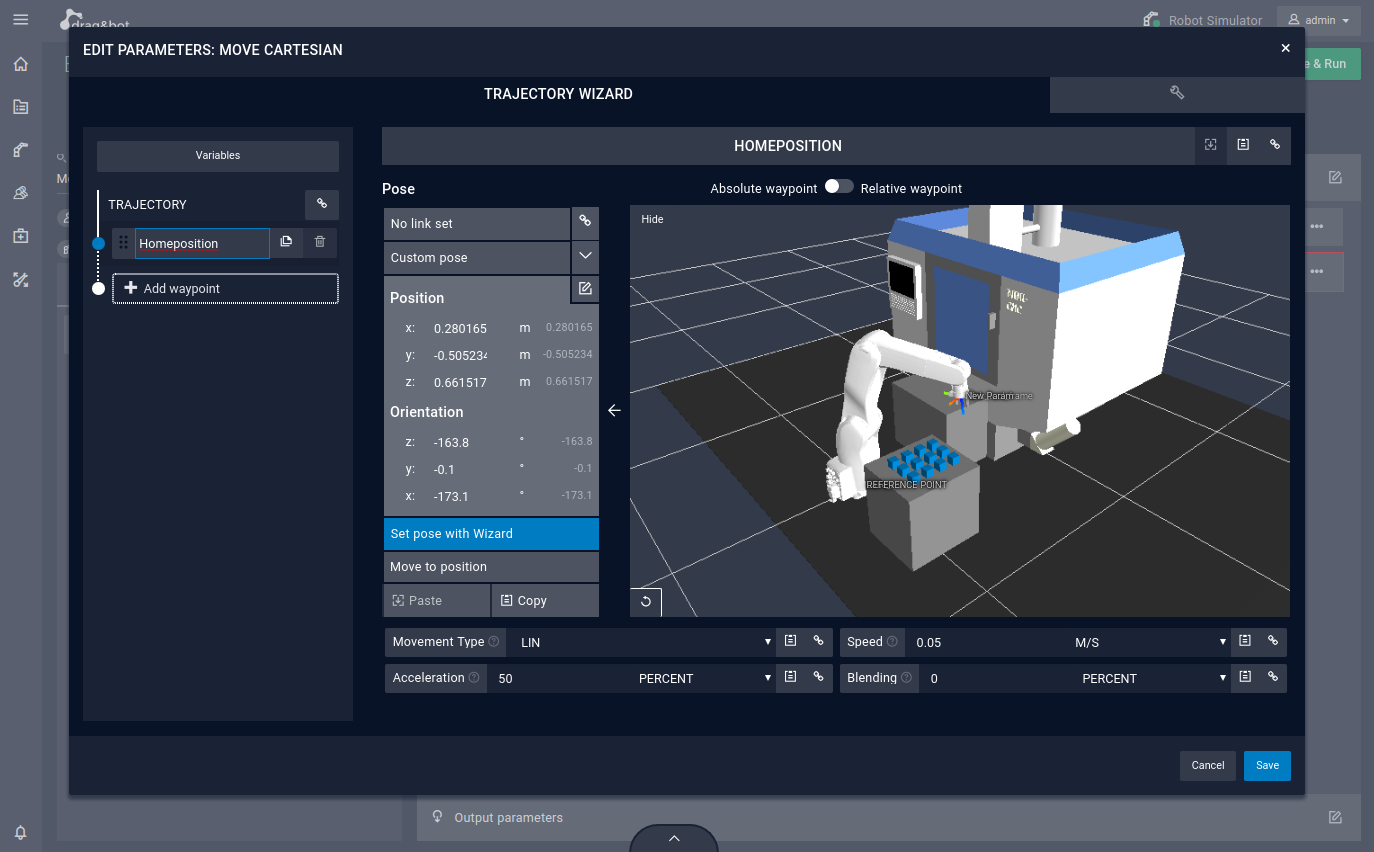
The first view you will see when parameterizing a trajectory is similar to the following picture. The trajectory wizard will display an empty pose which can be filled. The blue dot on the side indicates which waypoint is selected. In this case the waypoint New Param is selected and ready to be parametrized.
- For parameterizing the selected waypoint you need to click . You can also introduce the Euler frame manually by clicking on the top right symbol. For this tutorial it will be assumed that we use the Wizard for entering the values.

-
Now move the robot by clicking on the colored arrows until you reach your desired robot pose.
-
Click when you want to save the current pose.
-
After clicking you will see the values in the boxes Position and Orientation
-
A new waypoint can be added to the trajectory on the left side by clicking
 .
. -
Then you will need to also provide values to the new waypoint again by clicking .
Tutorials
... that show how to create and modify trajectories:
Corresponding function blocks
... that use trajectories to define robot movements: