Pick&Place programs
The following chapter contains variants of the Pick&Place program that build on each other:
- Create a basic Pick&Place program
- Extension: Movement optimization
- Extension: Add loop
- Extension: Add input parameters
- Extension: Add case distinction and user dialog
What you will learn
- Parameterization of "Compare-String", "Condition" and "User Dialog" functions
- Linking of output values in function blocks
- Flow logic of the "Condition" function block
Extension: Add case distinction and user dialog
Video Tutorial
Step-by-step Guide
-
The basis of the program is the Pick&Place program with input parameters from the previous chapter. Make sure that the naming of the function blocks is identical to this program.
-
Duplicate and name the previous program.
-
Duplicate the third
Move CartesianBlock. -
Remove the 4th waypoint in the original
Move CartesianBlock Now name the function block "Move to Test Position". -
Remove the first three waypoints in the duplicated
Move CartesianBlock.
NOK distinction
- For the now following NOK distinction add three new function blocks after the
Move CartesianBlock "Move to test position":User Dialog,Compare-StringandCondition.
1. User Dialog
-
The
User Dialogin this program is intended to simulate the testing of the workpiece by asking the operator for "OK or NO OK". -
Edit the block
User Dialogand enter a corresponding question inMessage(e.g. "Workpiece OK"). -
To define the answers, name one button with "Yes" in the
Button Text(and e.g. "yes" in theButton Result Code) and another with "No". -
Save the settings for the
User Dialogblock.
2. Compare String
-
In the
Compare-Stringblock the operand 1 must now be connected to the output value of the User Dialog Block. -
Click on in operand 1 and select
Result - String. -
The condition "==" remains unchanged.
-
Enter "yes" in operand 2 or the text of the button Result Codes from the
User Dialogblock.
3. Condition
-
Edit the function block
Conditionand connect the input value via theConnect Valueto the output parameter "Compare String - Result". -
Save the settings.
-
You now have the possibility to define the processes for both conditions ("Then" and "Else") in the
Condition. -
Drag the duplicated
Move Cartesianblock from point (5) into theThenfield. -
Drag the three remaining blocks
Simulator Gripper - Open,Drive to approach positionandHome positionalso into theThenfield. -
Also add the function block
Simulator Reset -Gridto the last position of the "Then" field.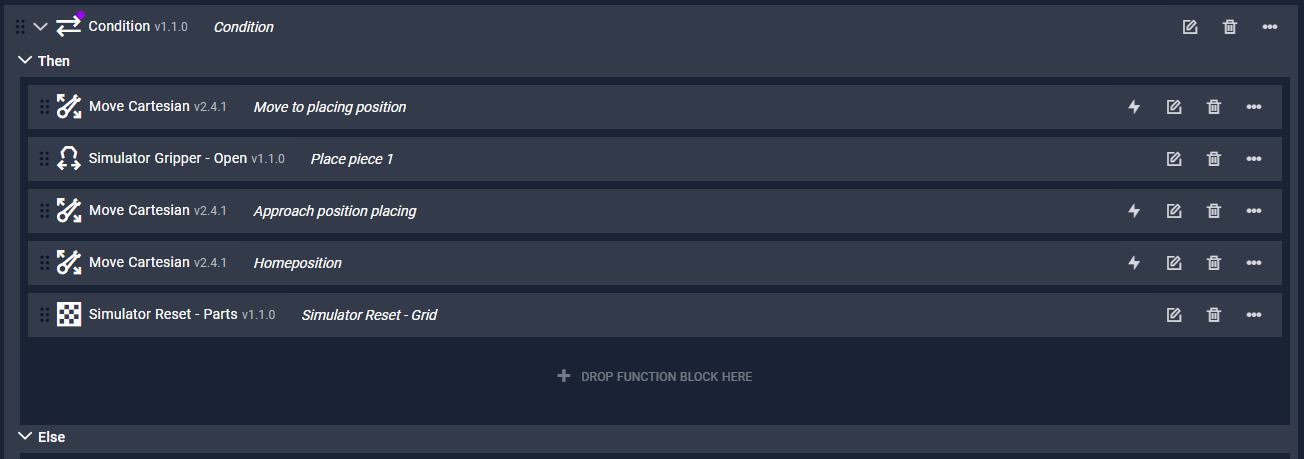
-
Now duplicate all function blocks in the "Then" field and drag them into the "Else" field.
-
Change the parameters of the first
Move Cartesianblock and define a new approach and deposit position for the workpiece (e.g. at the left edge of the table). Copy the data of the approach position. -
Parameterize the second Move Cartesian block from the "Otherwise" field insert the copied values of the approach position into the first waypoint Save the settings.
-
Remove the function block "Simulator Reset - All".
-
Ready! The placement positions of the workpiece are now determined by the answers of the
User Dialogand you have built a distinction in the Pick&Place program. (You can download the program here. At "My Programs" -> you can load external programs into drag&bot.)
Further information:
NOK distinction
The NOK distinction classifies the treated workpiece as "OK" (O.K.) or "not OK" (N.O.K.). In practice, this check is usually carried out using sensors. In the following tutorial, however, the sensor is simulated by a user dialog box.