Stäubli CS9 Controller Setup
Requirements
No special software options are required to be installed on the robot controller.
Downloads
The required controller files can be downloaded from here: Downloads
Configure the ethernet network
-
Switch the tech pendant to Manual Mode .

-
Connect the IPC with the J204 Ethernet port of the controller. Its highly recommended to connect the controller directly to the IPC without a switch inbetween.
-
Configure the Socket Servers at the techpendant:
- In the Main Menu switch to IO > Socket and select the TCP Servers tab.
- Add two Socket Servers with the following values.
- Name: DNBCommand, Port: 11000, Timeout: -1, End of string: 10, Nagle: Disabled
- Name: DNBInfo, Port: 11002, Timeout: -1, End of string: 10, Nagle: Disabled
-
Get the IP address of the robot controller
- In the Main Menu switch to SETTINGS > Network
- The IP address of the robot controller for drag&bot is the address noted next to the port J204. By default it should be
192.168.0.254. - If the controller port is connected to the IPC (or any other device) it should be marked as connected.
Upload the drag&bot controller program with an USB Stick
- Download and unzip the correct drag&bot Stäubli controller program files from here.
- Copy all directories of the unzipped file to the top directory of a USB stick.
- Plug the USB stick into the USB port J209 or J210 of the CS9 controller or the USB port at the back of the Stäubli teach pendant SP2.
- At the main menu of the teach pendant switch to VAL3 and select the Storages tab.
- At the dropdown menu select the USB device. This is probably USB0 for J209 or J210 and SP2_USB0 for the teach pendant.
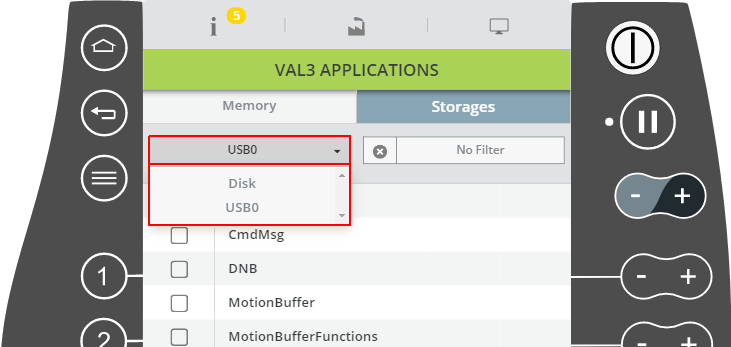
- A list of applications should show up. As some applications depend on others they need to be loaded to the robot controller in the correct order.
- Load the applications in the following order as descibed below to the robot controller:
- Cmd
- RcvCnfrm
- Status
- CmdMsg
- RcvCnfrmMsg
- StatusMsg
- MotionBuffer
- MotionBufferFunctions
- DNB
-
For each application proceed as follows:
-
Load the application by clicking the name. The view will automatically switch to the Memory tab and select the loaded application. It should have a prefix like USB0: or SP_USB0:
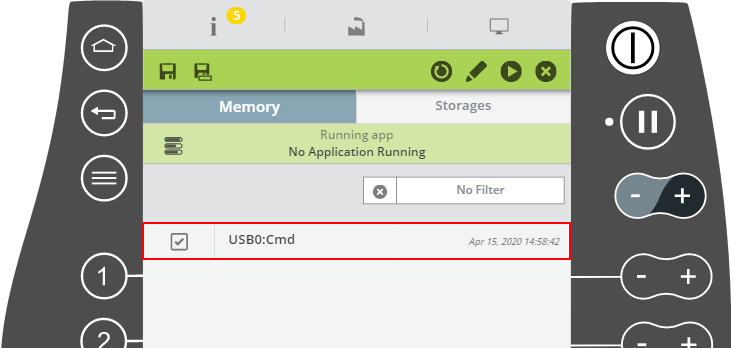
- Alternatively select the application with the checkbox and press the
 button on the top right. Then change manually to the Memory tab and select the loaded application.
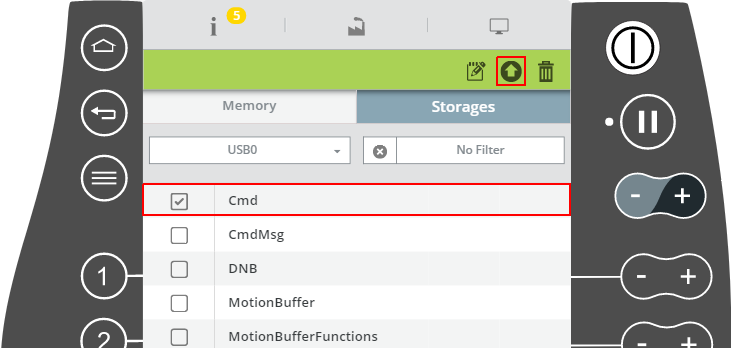
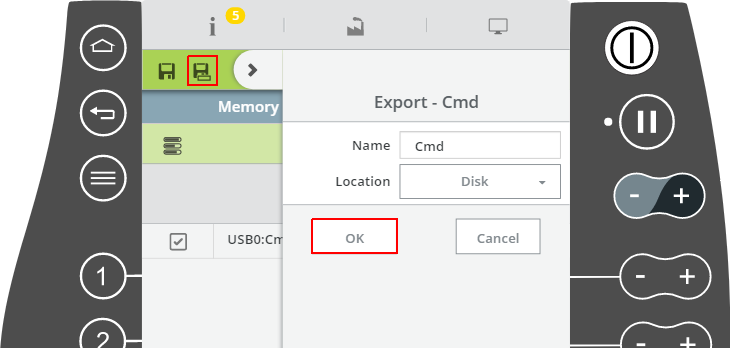
- Export the program to the Disk by pressing the
 button on the top left. When pressing the OK button no confirmation will show up and you can directly proceed with the next step. If you are updating the drag&bot controller program confirm to overwrite the file.
- Switch back to the Storages tab and proceed with the next application.
- After processing all applications, change in the dropdown menu back to Disk. All applications loaded before should show up.
- You can now remove the USB stick from the teach pendant.
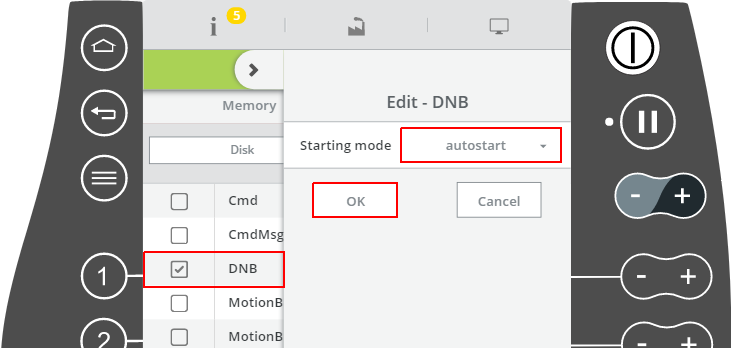
- Select the DNB application with the checkbox and press the
 button on the top right. The drag&bot controller program will then automatically start on controller startup. For more information about start see here.
 - Mark the application to autostart and confirm with the OK button.
- When changing back to the Memory tab you can remove the loaded applications with the USB0: or SP_USB0: prefix from the memory by selecting them and pressing the
 button on the top right.
 - Restart the Stäubli CS9 controller.
Setup for drag&bot Studio
- Please select Stäubli CS9 Controller from the dropdown menu in the drag&bot Component Manger.
- Configure the parameter IP for your setup. It has to match with the IP found in the section Configure the ethernet network.
- Configure your Robot Model for visualization. If your model is not listed, you can use the "-" entry to work without visualized robot model.