Universal Robots
Summary
- General information about the universal robot
- Prepare the universal robot to work with drag&bot
- Setup network configuration
Information
Use the Offline Simulator described here for testing UR without hardware
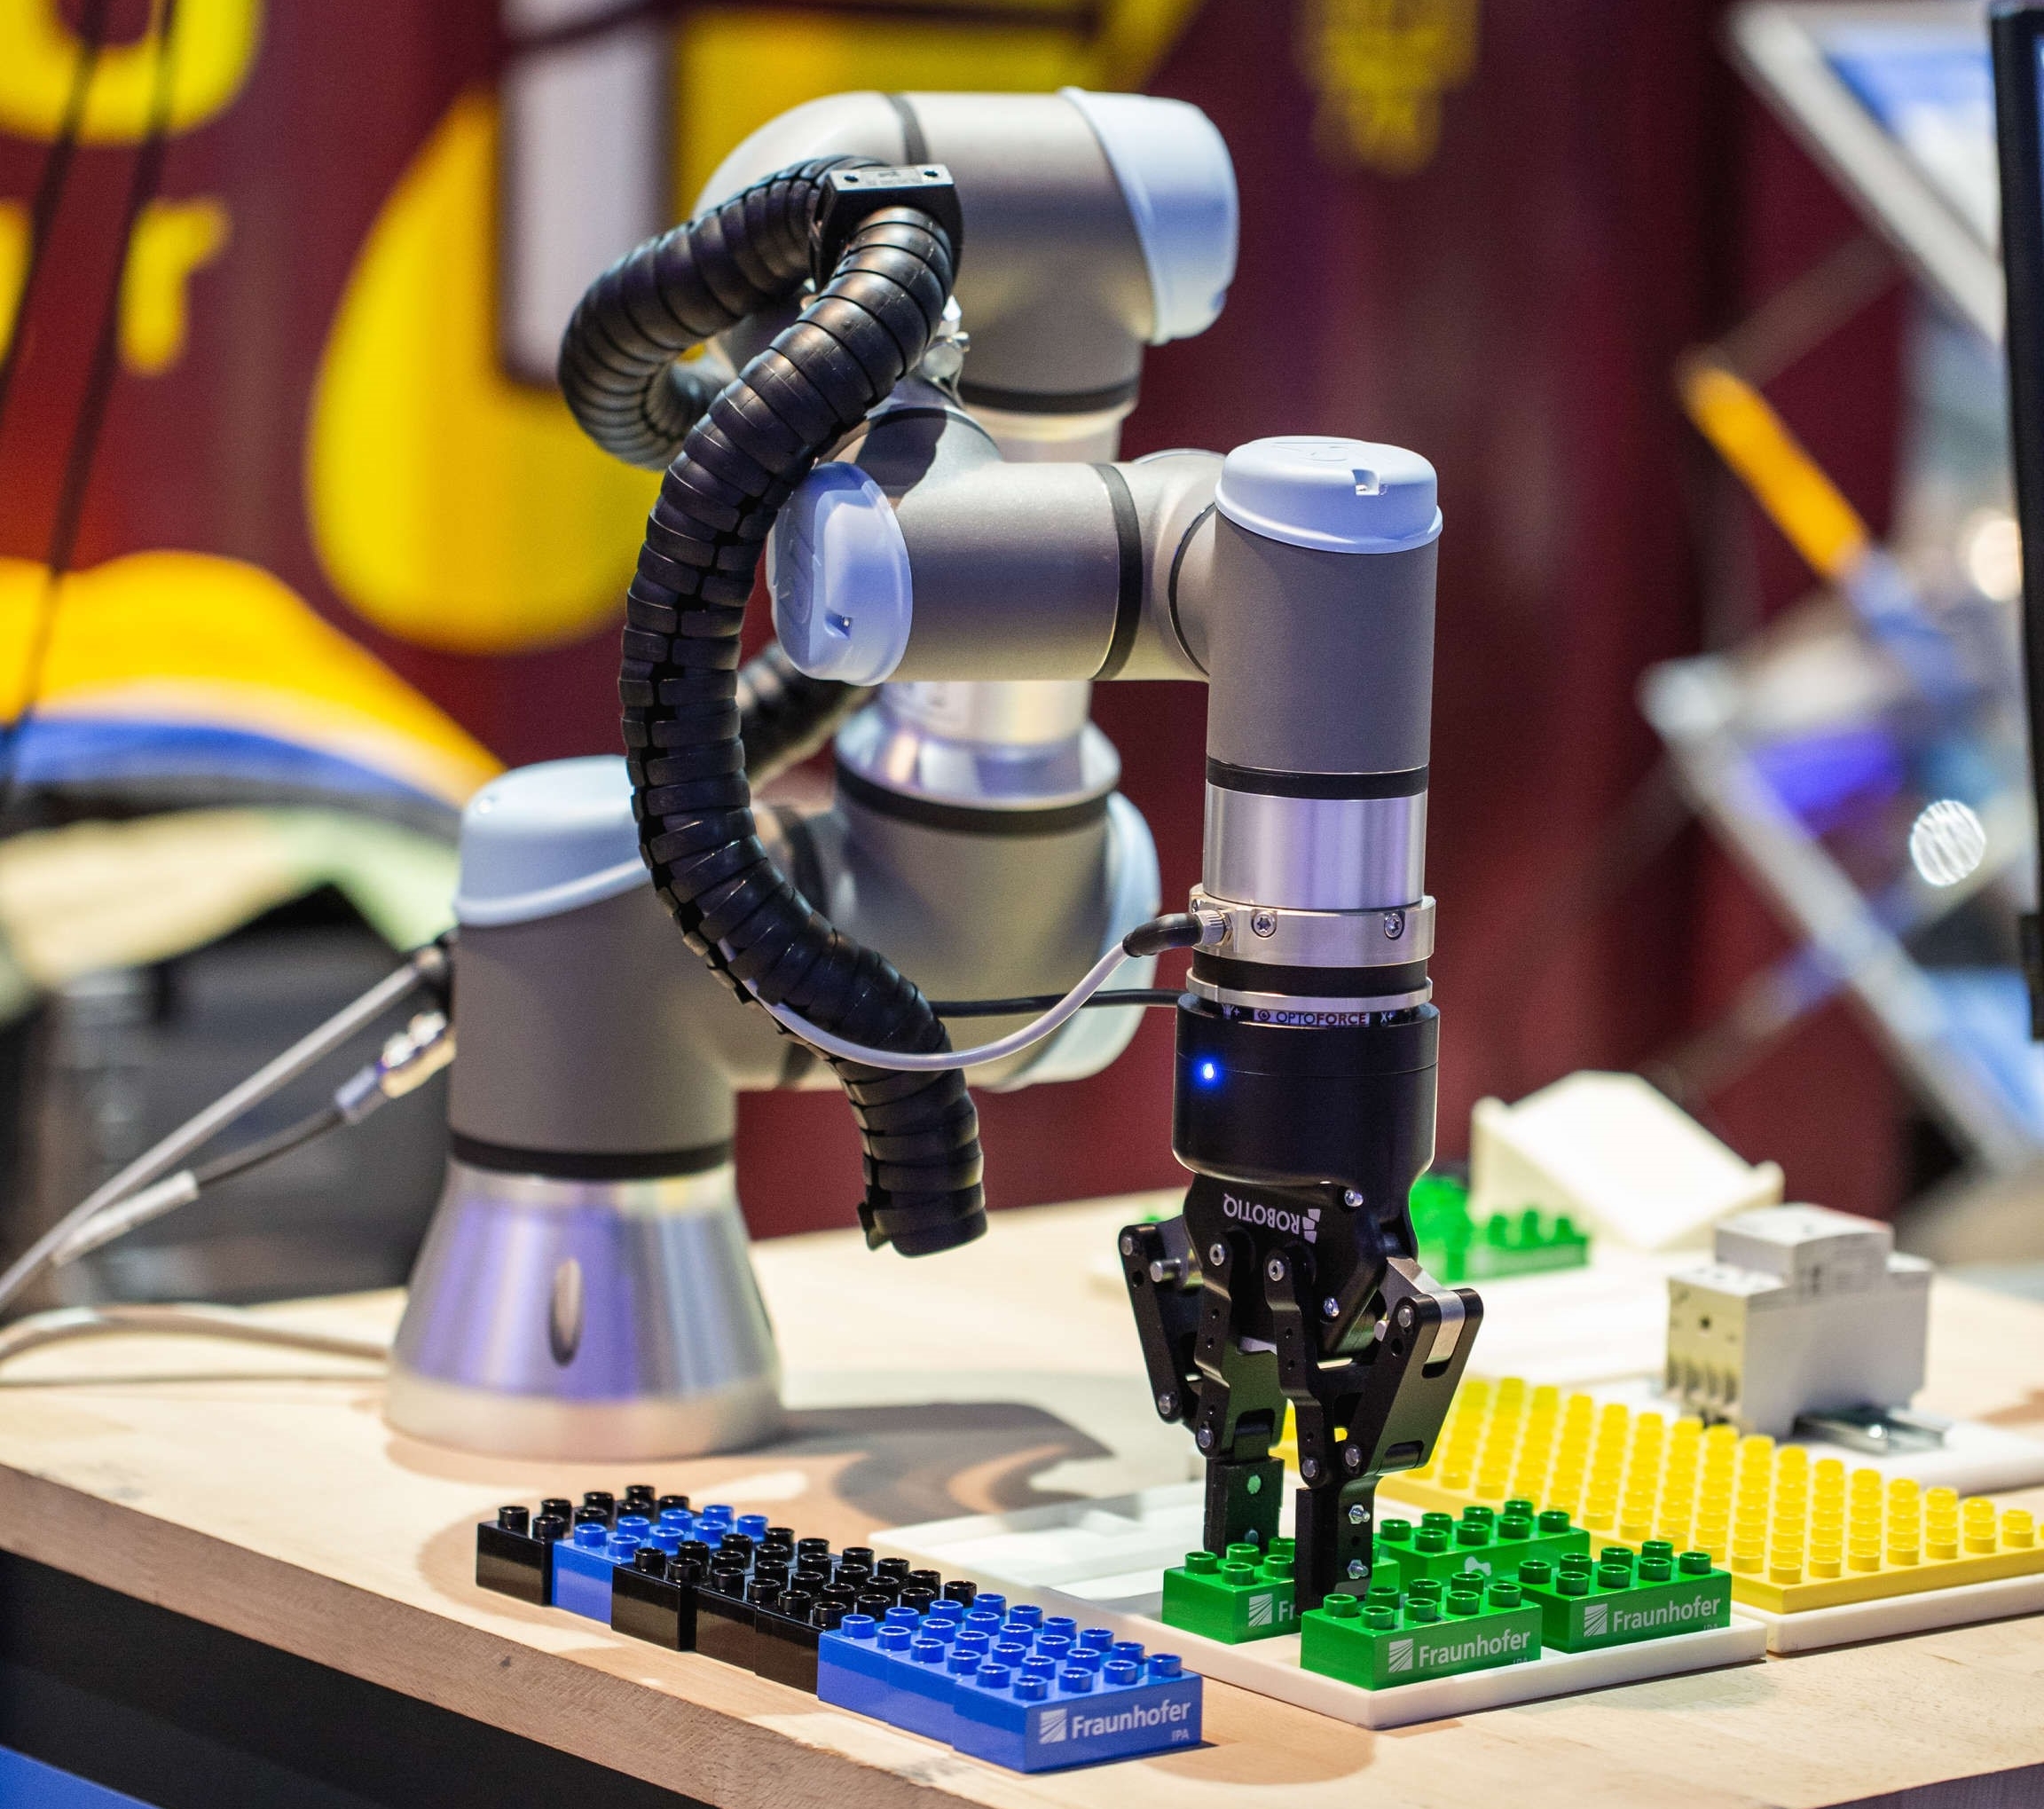
Introduction
Information
drag&bot supports the Universal Robots Software Versions V1.6 to V1.8 (CB2 series), V3.1 to V3.14 (CB3 sereis) and V5.0 to V5.9 (e-series). Newer versions not listed here might also work. The Universal Robots Software Version can be found in the About menu of the teach pendant.
Before working with the robot, please download the latest User Guide for your UR model and read it especially the safety instructions. (e.g https://www.universal-robots.com/). For downloading the right manual, you will need the robot model and the software version e.g. UR 5 / CB3.
When working with the robot, please take care of below points:
- Follow the safety instruction of the manufacturer.
- Keep a safety distance between the robot and its surrounding objects/human (working space area), especially during the robot movement.
- Press the Emergency-Stop button on the front side of the teach pendant in case of any emergency or in case of leaving the robot alone in a holding status.
Quick Start Robot
To quickly start up the robot after it has been installed, perform the following steps:
- Press the Emergency-Stop button on the front side of the teach pendant.
- Press the Power button on the teach pendant.
- Wait a minute while the system is starting up.
- When the system is ready, a pop-up will be shown on the touch screen, stating that the robot needs to be initialized.
- Press the button on the pop-up dialog. You will be taken to the initialization screen.
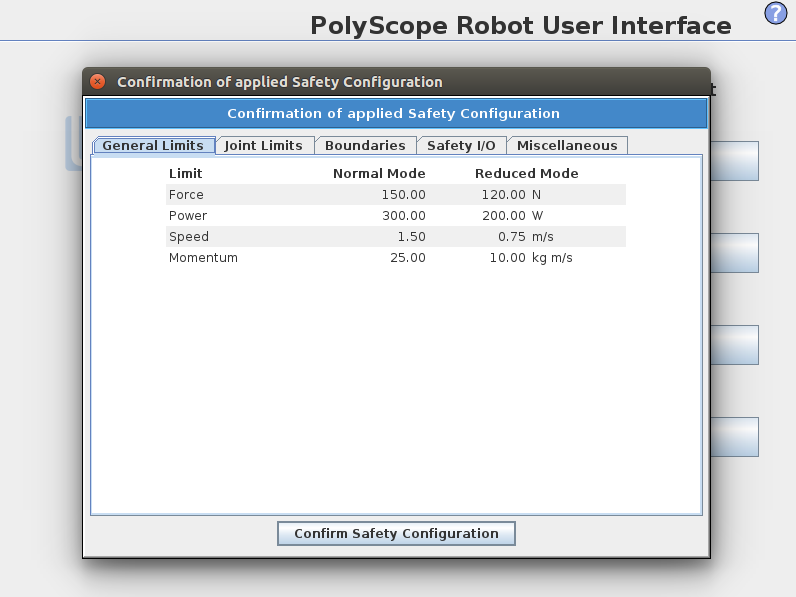
- Wait for the Confirmation of applied Safety Configuration dialog and press the Confirm Safety Configuration button. This applies an initial set of safety parameters that need to be adjusted based on a risk assessment.
- Release the Emergency Stop button. The robot state changes from Emergency Stopped to Power off.
- Move to outside the robot workspace area.
- Press the ON-Button on the touch screen, then wait for few seconds until the robot state changed to Idle.
- Verify that the payload mass and selected mounting are correct. You will be notified if the mounting detected based on sensor data does not match the selected mounting.
- Press the Start button on the touch screen. The robot now makes a sound and moves a little while releasing the brakes. The robot state goes to green as shown in the following figure.
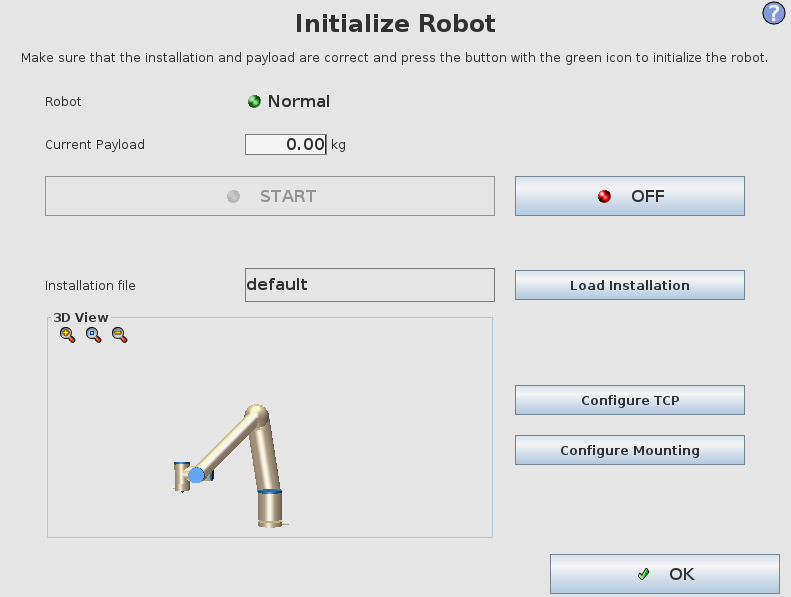
- Press the OK-Button to get to the Homescreen.
Instructions are taken from the UR manual pages II-4 and II-5.
Reset UR Installation
Information
This step is only necessary when you have a robot with an existing installation.
To use drag&bot a clean installation file has to be loaded. This means that no TCP (Tool Center Point) is configured in the controller or the respective transformation must be a zero transformation.
- From the Homescreen move to the installation preferences. Therefore press Program Robot, select the Installation Tab and then select the Load/Save entry.
- Press on the Load button and load the
default.installation>file. - Backup the
defaultinstallation file to keep the older settings. Press the Save as ... button and give the new file a name such asbackup.default, then click Submit-Button. - Now load again the
default.installationfile. - Check, if the TCP Configuration is correct in the TCP Configuration entry.
- If there are more than one TCP configured, select the TCP called TCP in the drop-down or create it new with the buttons New and Rename.
- Make sure the transformation of TCP is zero for all coordinates.
- Make sure TCP is set as default (the button Set as default is then disabled).
- After checking the TCP, save your changes in the Load/Save entry with the Save button. The selected installation should be the
defaultinstallation.
Configure Feature "Pause and Resume"
Newer versions of drag&bot provide a feature to pause the robot during movements and resume the movement later (it's marked as experimental feature). As this feature requires special configuration at the robot controller, which is described in the following.
To configure a CB robot controller for the pause and resume feature, perform the following steps in the teach pendant (Configuring the controller for an e-Series robot is described in the e-Series section):
- Restart the robot controller
- Touch the "Program Robot" button.
- Touch the "Empty Program" button.
- Select the "Structure" tab.
- Touch the "Wait" button.
- Select the "Command" tab.
- Select the "Wait 0.01 seconds" option.
- Open the "File" menu at the top bar.
- Select the "Save As ..." menu item.
- Select the filename textfield.
- Enter the program name "DNB-Program" (without .urp ending)
- Press the "Submit" button
- Setup the robot to load the program on startup.
- Restart the robot controller
Now you can enable the "Experimental Pause/Resume Interface" in the drag&bot Studio Component Manager settings for the UR robot.
Digital Inputs and Outputs
The UR controller provides several Digital I/Os, which are accessible through drag&bot:
| Controller Ports | Type | drag&bot Pin | Notes |
|---|---|---|---|
| Digital Input 0 to 7 | Digital Input | DI[0] to DI[7] | |
| Configurable Input 0 to 7 | Digital Input | CI[0] to CI[7] | Available since controller software version 3.1 |
| Tool Input 0 to 1 | Digital Input | TI[0] to TI[1] | Available since controller software version 3.1 |
| Tool Input 8 to 9 | Digital Input | TI[8] to TI[9] | Available before controller software version 3.1 |
| Digital Output 0 to 7 | Digital Output | DO[0] to DO[7] | |
| Configurable Output 0 to 7 | Digital Output | CO[0] to CO[7] | Available since controller software version 3.1 |
| Tool Output 0 to 1 | Digital Output | TO[0] to TO[1] | Available since controller software version 3.1 |
| Tool Output 8 to 9 | Digital Output | TO[8] to TO[9] | Available before controller software version 3.1 |
To interact with the Digital I/Os using this numbering in your programs use the function blocks
- Digital I/O Device - Get
- Digital I/O Device - Set
- Digital I/O Device - Wait For
as described in the Function Block Library overview.