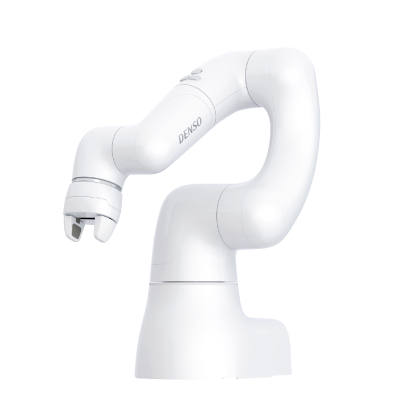
Denso Driver Usage
Requirements
The setup has ben accomplished.
Step 1: Start the controller
- Turn on the Controller.
- Check that no emergency stop is pressed.
- Check that robot is in Automatic Mode. Please keep in mind is your responsability not to access the robot cell during Automatic Mode operation.
- Check that robot speed configured in the teach pendant is at least 10%. If speed is not changed, then the robot will move very slow.
Step 2: Robot system configuration
- Please select the corresponding Denso model from the drop-down menu in the drag&bot Component Manger.
- Click on Update and Install.
- Click on the PEN icon to edit the driver configuration.
- Enter your robot IP address if differs and select your robot model number and activate Autopower for commodity, then click Apply.
Cobotta

If you are using a Cobotta robot, as it doesn't include a teach pendant you will need to use and Android tablet or phone for this purpose:
- Install Denso Remote Teach Pendant application on the Android device.
- Connect the Android device through USB cable to the robot. The robot should be already powered.
- Activate USB tethering.
- Open the application, set the IP address to connect. Now you will see the teach pendant on your Android device.
Cobotta requires also a calibration process before using the robot and after connecting the remote teach pendant. The teach pendant will display te instructions to perform a calibration. Basically brakes will be released and then you need to move the joints until the range limit.
Please contact Denso directly for further information.
Function Blocks
Digital I/O - Get
Requests the value of a digital I/O pin of the robot.
| Name | Data type | Description | |
|---|---|---|---|
| Inputs | Pin Number | Integer | Number of a digital I/O pin. |
| Outputs | Value | Boolean | The value of the digital I/O pin. |
| Exceptions | ERROR_NO_DIGITAL_IO | - | The exception is raised, if the respective digital I/O does not exist. |
| TIMEOUT | - | The exception is raised, if the digital I/O state can not be requested from the robot. |
Digital I/O - Set
Sets the value of one of the I/O pins of the robot.
| Name | Data type | Description | |
|---|---|---|---|
| Inputs | Pin Number | Integer | Number of a digital I/O pin. |
| Value | Boolean | Value of the digital I/O pin. | |
| Outputs | - | ||
| Exceptions | ERROR_NO_DIGITAL_IO | - | The exception is raised, if the respective digital I/O does not exist. |
| ERROR_NO_DIGITAL_OUTPUT | - | The exception is raised, if the respective digital I/O does exist, but is no digital output. | |
| TIMEOUT | - | The exception is raised, if the digital I/O state can not be set at the robot. |
Digital I/O - Wait For
Pauses the program execution until the desired value is read on the given digital I/O pin. A timeout can be specified to throw an exception.
| Name | Data type | Description | |
|---|---|---|---|
| Inputs | Pin Number | Integer | Number of a digital I/O pin. |
| Desired Value | Boolean | The value which has to be read on the digital I/O pin to continue program execution. | |
| Timeout | Float | Timeout in seconds to wait for the signal before a TIMEOUT exception is thrown. A value of zero waits infinitely. | |
| Outputs | - | ||
| Exceptions | ERROR_NO_DIGITAL_IO | - | The exception is raised, if the respective digital I/O does not exist. |
| TIMEOUT | - | The exception is raised, if the digital I/O state can not be requested from the robot. |